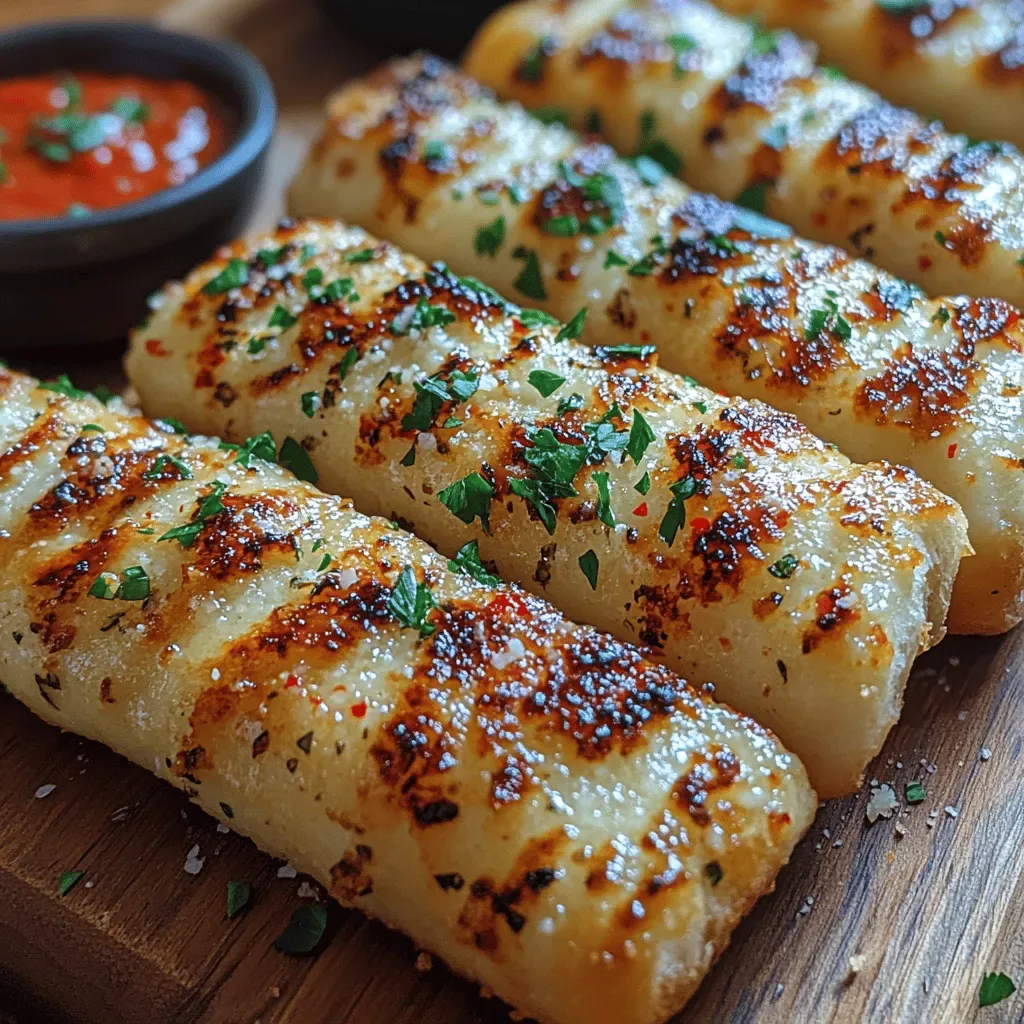
Imagine biting into a golden‑brown stick that cracks open with a satisfying crunch, releasing a burst of buttery garlic aroma that instantly lifts your morning mood. That’s the magic of our Crunchy Garlic Breadsticks, a brunch‑ready treat that feels indulgent yet simple enough for a weekday rush.
What sets these breadsticks apart is the combination of a light, airy interior and a perfectly crisp exterior, achieved by a quick brush of garlic‑infused butter and a brief bake at high heat. A sprinkle of flaky sea salt adds a subtle pop that balances the richness.
Family members, friends, or even solo brunch enthusiasts will love them. Serve them alongside scrambled eggs, a fresh fruit salad, or a velvety latte for a complete morning spread that feels café‑grade without leaving home.
The process is straightforward: mix a basic yeasted dough, let it rise, shape into sticks, brush with garlic butter, and bake until the edges turn deep amber. In under an hour, you’ll have a tray of irresistible breadsticks ready to share.
Why You'll Love This Recipe
Irresistible Crunch: A high‑heat bake creates a caramelized crust that cracks delightfully, giving each bite a satisfying snap that’s hard to resist.
Garlic‑Forward Flavor: Fresh garlic and herb‑infused butter coat every surface, delivering a bold, aromatic taste without overwhelming the palate.
Quick & Easy: From mixing to baking, the entire process fits neatly into a 45‑minute window, perfect for busy mornings or lazy brunches.
Customizable Base: The simple dough serves as a blank canvas for sweet, savory, or spicy twists, letting you tailor each batch to your mood.
Ingredients
For these breadsticks, the foundation is a classic yeasted dough that yields a tender crumb. The garlic butter mixture is the flavor engine, marrying mellow butter with pungent garlic and fragrant herbs. A final dusting of flaky sea salt adds texture and a burst of savory contrast. Together, these components create a balanced bite that’s both comforting and exciting.
Dough
- 2 ¼ teaspoons (1 packet) active dry yeast
- 1 ½ cups warm water (110°F/45°C)
- 3 ½ cups all‑purpose flour
- 2 tablespoons olive oil
- 1 teaspoon sugar
- 1 teaspoon salt
Garlic Butter
- ½ cup unsalted butter, melted
- 4 cloves garlic, minced
- 1 tablespoon fresh parsley, finely chopped
- ½ teaspoon flaky sea salt
Optional Add‑Ins
- ¼ cup grated Parmesan cheese
- ¼ teaspoon red pepper flakes (for heat)
The yeast gives the dough its lift, while warm water activates it quickly. Olive oil adds tenderness, and a pinch of sugar feeds the yeast for a subtle sweetness. The garlic butter’s melted butter ensures an even coating, the minced garlic infuses every nook, and parsley supplies a fresh, herbaceous finish. Optional Parmesan and red pepper flakes let you crank up umami or heat, turning a classic into a personalized masterpiece.
Step-by-Step Instructions
Preparing the Dough
In a large mixing bowl, dissolve the yeast and sugar in the warm water; let it sit for 5‑7 minutes until frothy, indicating the yeast is active. Add the flour, olive oil, and salt, then stir until a shaggy dough forms. Turn the dough onto a lightly floured surface and knead for 8‑10 minutes until smooth and elastic. This gluten development is key to achieving that airy interior.
First Rise & Shaping
Lightly oil a clean bowl, place the dough inside, cover with a damp towel, and let it rise in a warm spot for 45‑60 minutes, or until doubled in size. Once risen, punch it down to release excess air, then divide the dough into 8 equal pieces. Roll each piece into a 10‑inch rope, then gently flatten the middle to create a “V” shape, forming the classic breadstick silhouette.
Baking & Finishing
- Preheat Oven. Set the oven to 425°F (220°C) and place a baking sheet lined with parchment paper inside to heat up. A hot surface encourages immediate oven‑spring, giving the sticks a lofty rise.
- Brush with Garlic Butter. While the oven heats, combine melted butter, minced garlic, parsley, and flaky sea salt in a small bowl. Brush each shaped stick generously on all sides; the butter will melt into the dough, creating a golden crust.
- Optional Toppings. Sprinkle Parmesan and red pepper flakes over the buttered sticks if you desire extra flavor and a hint of spice. These additions melt into the crust during baking, adding depth.
- Bake. Transfer the prepared sticks to the preheated sheet and bake for 12‑15 minutes, or until the tops are deep amber and the edges snap when tapped. Rotate the sheet halfway through for even browning.
- Cool Slightly. Remove the breadsticks from the oven and let them rest on a wire rack for 3‑4 minutes. This brief cooling locks in steam, preserving the interior fluff while keeping the exterior crisp.
Serving
Serve the breadsticks warm, directly from the rack, alongside your favorite brunch spreads. A drizzle of extra garlic butter or a side of marinara for dipping adds an indulgent touch. Enjoy the contrast of crunchy exterior and tender middle with every bite.
Tips & Tricks
Perfecting the Recipe
Temperature‑Controlled Water. Use water that’s exactly 110°F; hotter water kills yeast, cooler water slows activation. A quick thermometer check guarantees consistent rise.
Don’t Over‑Knead. Stop kneading once the dough feels smooth and springs back. Over‑kneading can make the crumb too tight, reducing the desired airy texture.
Steam Boost. Place a shallow pan of hot water on the oven floor during the first 5 minutes of baking; steam helps develop a glossy, crackly crust.
Flavor Enhancements
Add a splash of white wine to the dough for subtle acidity, or fold in roasted garlic cloves for a sweeter, mellower garlic note. Finishing with a light drizzle of truffle oil elevates the breadsticks to a gourmet level without extra effort.
Common Mistakes to Avoid
Skipping the second brush of garlic butter after baking can leave the crust dry. Also, avoid opening the oven door during the first 8 minutes; temperature loss prevents proper oven‑spring and can produce a soggy bottom.
Pro Tips
Use a Baking Stone. Preheating a stone creates a uniformly hot surface, yielding an even, crisp bottom on every stick.
Brush While Hot. Apply the garlic butter as soon as the sticks exit the oven; the residual heat melts the butter instantly, sealing flavor into the crust.
Freeze for Future Use. After cooling, wrap each stick individually in foil and freeze. Reheat directly from frozen for a quick, crunchy snack any time.
Variations
Ingredient Swaps
Replace regular flour with whole‑wheat for a nuttier flavor and extra fiber. Swap butter for olive oil‑based garlic spread to cut calories while retaining richness. For a cheesy twist, fold shredded mozzarella into the dough before the first rise.
Dietary Adjustments
Gluten‑free? Use a 1‑to‑1 gluten‑free flour blend and add a tablespoon of xanthan gum for elasticity. Vegan? Substitute butter with melted coconut oil and use nutritional yeast instead of Parmesan. For keto, replace flour with almond flour and sweeten with a pinch of erythritol if desired.
Serving Suggestions
Pair the sticks with a sunny‑side‑up egg and avocado slices for a balanced brunch plate. They also shine as a side to creamy tomato bisque or as a snack dipped in hummus. A light drizzle of honey transforms them into a sweet‑savory treat perfect for tea time.
Storage Info
Leftover Storage
Allow the breadsticks to cool completely, then place them in an airtight container or zip‑top bag. Store in the refrigerator for up to 4 days. For longer keeping, wrap each stick in foil, then place them in a freezer‑safe bag; they’ll maintain quality for up to 3 months.
Reheating Instructions
Reheat in a pre‑heated 350°F (175°C) oven for 8‑10 minutes, uncovered, until the crust regains its crunch. For a quicker option, microwave on medium power for 30‑45 seconds, then finish under a broiler for 1‑2 minutes to restore crispness. Add a dab of garlic butter before serving for extra moisture.
Frequently Asked Questions
This Crunchy Garlic Breadsticks recipe delivers a perfect blend of buttery garlic flavor, airy interior, and satisfyingly crisp edges—all within a manageable time frame. We’ve covered ingredient selection, step‑by‑step technique, storage, and creative twists so you can adapt it to any palate or dietary need. Feel free to experiment with herbs, cheeses, or spices to make it truly yours. Serve warm, enjoy the crunch, and let the aroma set the tone for a delightful brunch or snack time.