Peanut Butter Crunch Bliss Bars: A Delicious No-Bake Treat
No-bake desserts have become increasingly popular among home bakers and dessert lovers alike. They offer the perfect solution for satisfying sweet cravings without the need for extensive baking. Among these delightful treats, Peanut Butter Crunch Bliss Bars stand out as a deliciously indulgent option that doesn’t compromise on health. These bars are not only easy to make but also cater to various dietary preferences, making them a versatile addition to your dessert repertoire.
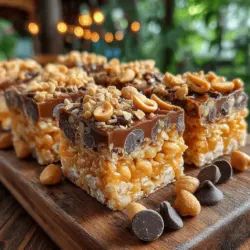
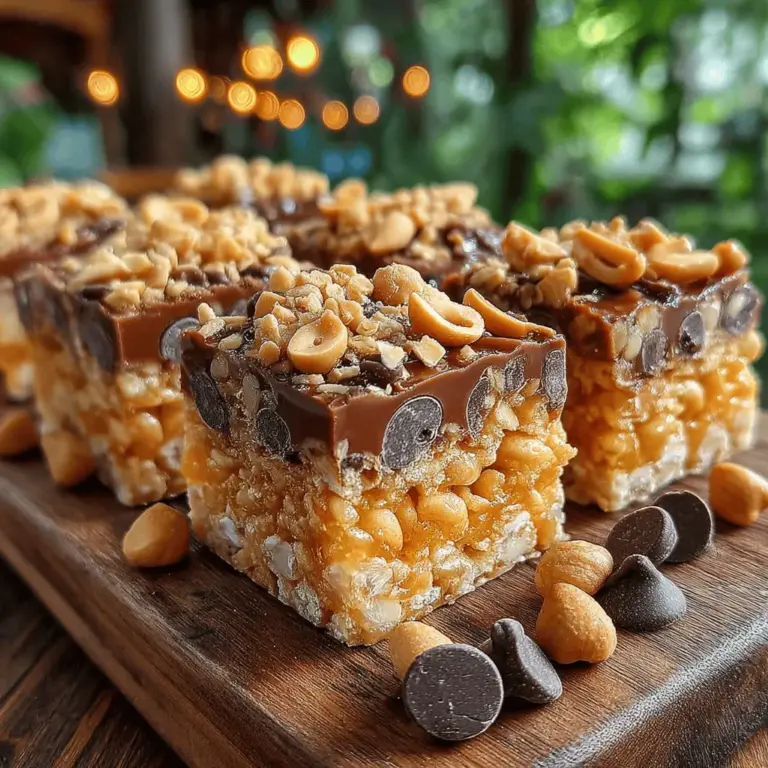
The appeal of Peanut Butter Crunch Bliss Bars lies in their harmonious blend of flavors and textures. With the rich, creamy taste of peanut butter, a hint of sweetness from natural sweeteners, and a satisfying crunch from puffed rice, these bars manage to be both nutritious and indulgent. They are an ideal snack for busy individuals, a post-workout treat, or a wholesome dessert that can be enjoyed guilt-free.
Understanding the Ingredients
Before diving into the recipe, it’s essential to understand the role of each ingredient in creating these delightful bars. By knowing the nutritional benefits and flavors they bring, you can appreciate the simplicity and goodness packed into every bite.
Natural Peanut Butter: At the heart of our Peanut Butter Crunch Bliss Bars is natural peanut butter, which provides a rich, nutty flavor and a creamy texture. Unlike conventional peanut butter, which may contain added sugars and unhealthy oils, natural peanut butter is made from just ground peanuts. This means it retains its essential nutrients, such as protein, healthy fats, and vitamins. Its creamy texture not only binds the bars together but also offers a satisfying mouthfeel.
Honey or Maple Syrup: For sweetness, we turn to natural alternatives like honey or maple syrup. Both options are not only healthier than refined sugars but also add their unique flavors to the bars. Honey brings a floral sweetness, while maple syrup offers a rich, caramel-like taste. These natural sweeteners contribute to the bars’ delicious flavor profile while keeping them wholesome.
Rolled Oats: Rolled oats are a staple ingredient in many healthy snacks, and for good reason. They are packed with fiber, which aids in digestion and helps you feel full longer. In our Peanut Butter Crunch Bliss Bars, rolled oats provide a chewy texture that complements the creaminess of the peanut butter. Furthermore, they are a great source of complex carbohydrates, making them a nutritious energy boost.
Puffed Rice Cereal: To achieve that delightful crunch, we incorporate puffed rice cereal. This light and airy ingredient not only adds a satisfying texture but also helps to balance the density of the peanut butter and oats. Puffed rice cereal is low in calories, making it an excellent choice for those looking to enjoy a crunchy snack without the extra calories.
Mini Chocolate Chips: To satisfy the sweet tooth, mini chocolate chips are added to the mix. They melt slightly during the preparation, creating pockets of rich chocolate flavor throughout the bars. Aside from enhancing the taste, they also provide visual appeal, making the bars even more tempting.
Chopped Peanuts: While optional, chopped peanuts can be added for an extra crunch and enhanced peanut flavor. They bring a delightful texture contrast and complement the creamy peanut butter, making each bite more enjoyable.
Vanilla Extract & Salt: Lastly, a splash of vanilla extract and a pinch of salt work wonders in elevating the flavors of the bars. Vanilla extract adds depth and warmth, while salt balances the sweetness, ensuring a well-rounded flavor profile.
Step-by-Step Instructions
Before you begin making your Peanut Butter Crunch Bliss Bars, it’s crucial to prepare your workspace and gather all ingredients. Proper organization will help streamline the process and ensure a successful outcome.
Preparing the Baking Pan: Start by preparing a square baking pan, typically 8×8 inches, for your bars. Line the pan with parchment paper, allowing some overhang on the sides. This step is essential, as it will make removing the bars much easier once they are set. For added protection against sticking, you can lightly grease the parchment paper with a bit of coconut oil or non-stick spray.
Mixing the Wet Ingredients: In a medium saucepan over low heat, combine the natural peanut butter and your choice of honey or maple syrup. Stir gently until the mixture is smooth and well combined. This melting process is critical, as it makes it easier to incorporate the ingredients later. Make sure to stir continuously to prevent burning and promote even melting.
Combining the Dry Ingredients: In a large mixing bowl, combine the rolled oats, puffed rice cereal, and optional chopped peanuts. This step ensures an even distribution of dry ingredients, which is key for achieving a balanced flavor and texture in every bite. Toss the ingredients together gently to ensure they are well mixed.
Merging Wet and Dry Mixtures: Once your wet ingredients are melted and smooth, pour them over the dry mixture. Using a spatula or wooden spoon, gently fold the wet and dry ingredients together. The goal is to achieve a uniform blend without over-mixing, which could lead to a dense bar. Be patient, as it may take a few moments for everything to come together nicely.
Pressing into the Pan: After merging the mixtures, transfer the combined ingredients into your prepared baking pan. It’s important to press the mixture down firmly and evenly into the pan. This step is crucial for achieving the right structure and ensuring that the bars hold together once set. Use a flat-bottomed measuring cup or spatula to compact the mixture evenly across the surface.
By following these initial steps, you set a solid foundation for your Peanut Butter Crunch Bliss Bars. The process is straightforward and requires minimal ingredients, making it accessible for bakers of all skill levels. In the next part of the article, we will explore the final steps to complete these delicious bars and tips for storing and enjoying them.
{{image_2}}
Chilling the Bars
Once you have mixed your ingredients and pressed them into your prepared pan, it’s time for the crucial chilling step. Chilling the bars allows them to firm up properly, ensuring they hold their shape when cut. This is essential not only for stability but also for enhancing the flavors as they meld together.
Why Chilling is Essential for Setting the Bars
The chilling process solidifies the fats in the nut butter and coconut oil, which helps bind the ingredients together. Leaving the bars to chill for at least 1-2 hours in the refrigerator ensures they set properly. Alternatively, if you’re in a hurry, you can place them in the freezer for about 30-45 minutes. This quick chilling method works well but be cautious not to let them freeze solid, as that might make cutting them more challenging.
Cutting and Serving
Once the bars have chilled sufficiently, it’s time to cut and serve. Carefully remove the bars from the pan using the parchment paper. Place them on a cutting board and use a sharp knife to cut them into even squares or rectangles, depending on your preference for serving size.
Presentation Ideas and Serving Suggestions
For an appealing presentation, consider arranging the bars on a decorative platter. You can garnish the top with a drizzle of melted chocolate, a sprinkle of sea salt, or even some crushed nuts for an added crunch. These bars pair wonderfully with a cup of coffee or a glass of plant-based milk, making them a perfect treat for any occasion. Serve them at parties, school lunches, or as a post-workout snack, and watch as they become an instant favorite among friends and family.
Nutritional Information
Understanding the nutritional content of your Peanut Butter Crunch Bliss Bars is important, especially if you’re mindful of your dietary needs. Here’s a breakdown of the nutritional content per bar, assuming you cut the recipe into 12 bars:
– Calories: Approximately 180
– Protein: 5g
– Carbohydrates: 18g
– Fats: 10g
– Fiber: 3g
Health Benefits of the Recipe Ingredients
The ingredients used in this recipe are packed with health benefits. Peanut butter is a great source of protein and healthy fats, providing energy and promoting satiety. The oats contribute dietary fiber, which aids digestion and helps keep you full longer. Additionally, the honey or maple syrup serves as a natural sweetener, offering a healthier alternative to refined sugars.
By focusing on energy-boosting ingredients, these bars deliver not just a tasty treat, but a snack that can power you through your day.
Storage and Shelf Life
To keep your Peanut Butter Crunch Bliss Bars fresh, proper storage is essential.
Best Practices for Storing the Bars
Place the bars in an airtight container, separating layers with parchment paper to prevent sticking. If stored properly, they can last up to a week in the refrigerator.
Airtight Container and Refrigeration Guidelines
For optimal freshness, always keep your bars in the fridge. The cool temperature helps maintain their texture and flavor. If you anticipate not finishing them within a week, consider freezing them.
Tips for Freezing and Thawing for Optimal Freshness
To freeze the bars, wrap each one individually in plastic wrap and place them in a freezer-safe container. They can be stored in the freezer for up to three months. When you’re ready to enjoy a bar, simply remove it from the freezer and allow it to thaw in the refrigerator for a few hours or at room temperature for about 30 minutes.
Creative Variations
One of the best aspects of the Peanut Butter Crunch Bliss Bars is their versatility. Here are some suggestions for ingredient substitutions and additions to customize your bars:
Nut Butter Alternatives
If you’re looking to switch things up, consider using almond butter or sunflower seed butter. Almond butter offers a slightly different flavor and texture, while sunflower seed butter is a great nut-free option, especially for those with allergies.
Sweetener Options
For those who prefer a different sweetness, try using agave syrup or coconut sugar. Each sweetener provides a unique flavor profile that can enhance the overall taste of your bars.
Additional Mix-Ins
Get creative with additional mix-ins! Consider adding dried fruits like cranberries or apricots for a burst of flavor, or sprinkle in seeds such as chia or flaxseed for added nutritional benefits. You can also experiment with spices like cinnamon or nutmeg to elevate the taste further.
The Benefits of No-Bake Desserts
No-bake desserts like the Peanut Butter Crunch Bliss Bars offer several advantages that make them appealing to home cooks.
Time-Saving Aspect and Ease of Preparation
One of the primary benefits is the time-saving aspect. These bars can be whipped up in less than 30 minutes, making them an ideal choice for those busy days when you still want a homemade treat. There’s no need to preheat the oven or deal with complicated baking processes.
Versatility and Adaptability for Various Occasions
No-bake desserts are also incredibly versatile. They can be adapted to fit various dietary needs and preferences, making them suitable for gatherings, lunchboxes, or a quick snack on the go. Plus, with so many options for customization, you can create different flavors to keep things exciting.
Conclusion
The Peanut Butter Crunch Bliss Bars are a delightful combination of healthiness and indulgence. They are not only easy to prepare but also versatile enough to cater to different tastes and dietary requirements. With their delicious flavors and nutritious ingredients, these bars are sure to become a staple in your home.
We encourage you to try making these bars and experience the joy of sharing homemade treats with friends and family. Whether enjoyed as a post-workout snack or a sweet treat after dinner, these bliss bars are bound to impress. So gather your ingredients, get mixing, and enjoy the delightful crunch and flavor of your very own Peanut Butter Crunch Bliss Bars!