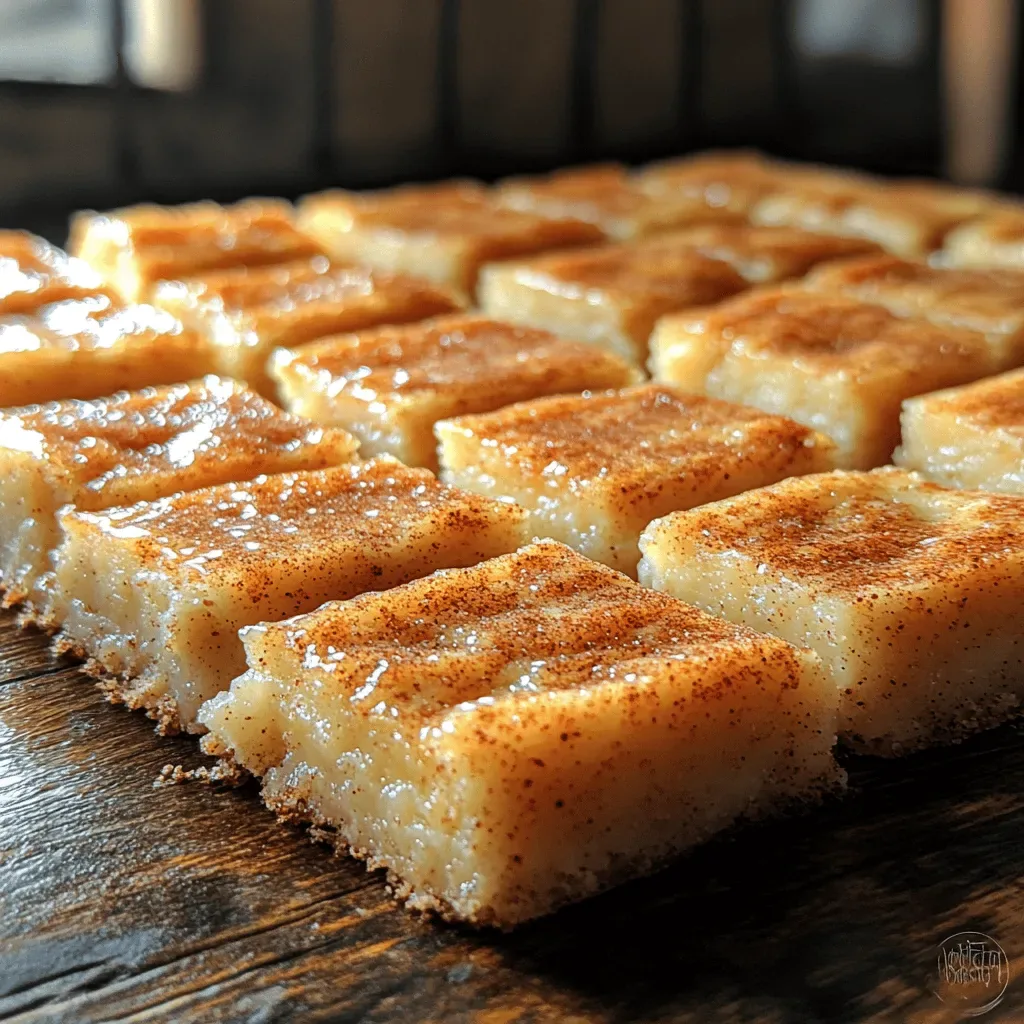
What makes this cake stand out isn’t just the speed; it’s the balance of textures that dance on your tongue. The base is tender and moist, thanks to a careful blend of butter and milk, while the apples stay slightly firm, offering a juicy contrast that keeps the palate excited. A generous sprinkle of cinnamon and a whisper of nutmeg create an aromatic backdrop that lingers long after the last crumb is gone. And the best part? You don’t need any fancy equipment—just a standard 9‑inch springform pan and a few pantry staples. Have you ever wondered why the cakes at your favorite bakery taste so much richer? The secret lies in the technique, not the cost, and I’m about to spill it.
Before we dive into the step‑by‑step, imagine the moment you cut into the cake and the steam rises, carrying the scent of caramelized apples and warm spice straight to the living room. Your family will gather, the kids will ask for seconds, and you’ll feel that same pride I felt watching my grandmother’s smile. But wait—there’s a hidden trick in step four that will make your crumb unbelievably fluffy, and I’m saving that reveal for later. Trust me, once you master that, you’ll never look back.
Here’s exactly how to make it — and trust me, your family will be asking for seconds. Grab your mixing bowls, preheat that oven, and let’s turn a simple list of ingredients into a masterpiece that sings of autumn, comfort, and pure, unadulterated joy. Ready? Let’s get started.
🌟 Why This Recipe Works
- Flavor Depth: The combination of fresh apples, sweet brown sugar, and aromatic cinnamon creates layers of taste that develop as the cake bakes, delivering a complex profile that feels both homey and sophisticated.
- Moist Texture: By incorporating melted butter and a splash of milk, the batter stays moist, while the apples release their own juices, ensuring every bite is juicy without becoming soggy.
- Speed: The entire process, from prep to finish, fits neatly into a 45‑minute window, making it perfect for busy weekdays or spontaneous gatherings.
- Ease of Execution: No special techniques or equipment are required; the method relies on simple folding and gentle mixing, which reduces the risk of over‑mixing and tough crumb.
- Versatility: The base cake can be easily adapted with nuts, raisins, or even a glaze, allowing you to tailor it to seasonal produce or personal preferences.
- Nutrition Balance: While indulgent, the cake still offers a modest amount of protein from the eggs and a dose of fiber from the apples, making it a satisfying treat that isn’t purely empty calories.
- Ingredient Quality: Using fresh, crisp apples and high‑quality butter elevates the taste dramatically, turning a simple recipe into a gourmet experience.
- Crowd‑Pleasing Factor: The warm spice notes and sweet apple aroma are universally loved, ensuring that even picky eaters will ask for another slice.
🥗 Ingredients Breakdown
The Foundation
All great cakes start with a solid base, and in this recipe, the foundation is a harmonious blend of all‑purpose flour, fine granulated sugar, and melted butter. The flour provides structure, while the sugar not only sweetens but also helps to tenderize the crumb by interfering with gluten formation. Butter, melted and slightly cooled, adds richness and contributes to a velvety mouthfeel that feels luxurious without being overly heavy. If you’re looking for a gluten‑free version, a 1‑to‑1 substitution with a blend of rice flour and tapioca starch works beautifully, though you might notice a slightly different texture.
Aromatics & Spices
Cinnamon is the star here, delivering that warm, sweet heat that makes you think of holiday markets and pumpkin lattes. Ground nutmeg and a pinch of ground cloves add complexity, ensuring the spice profile isn’t one‑dimensional. I always use freshly ground cinnamon because the aroma is noticeably brighter and the flavor more pronounced than pre‑ground varieties that have sat on the shelf for months. For those who love a little extra kick, a dash of ground cardamom can elevate the cake to an exotic level.
The Secret Weapons
Eggs act as the binding agent, providing lift and structure while also adding a subtle richness. Milk (or a dairy‑free alternative like oat milk) introduces moisture, ensuring the crumb stays tender throughout baking. Finally, a splash of vanilla extract ties everything together, smoothing out the edges of the spice and adding a fragrant background note that you’ll only notice after the first bite. If you’re avoiding dairy, a mix of coconut oil and almond milk works just as well, giving a faint coconut undertone that pairs nicely with apple.
Finishing Touches
The apples themselves are the hero of this cake. I prefer a mix of tart Granny Smith and sweet Golden Delicious; the tartness balances the sugar while the sweetness ensures the overall flavor isn’t too sharp. Peel, core, and slice them into thin wedges so they bake evenly and release just enough juice to keep the cake moist. A final dusting of powdered sugar after cooling adds a pretty finish and a hint of extra sweetness that makes the cake look as good as it tastes.
With your ingredients prepped and ready, let's get cooking. Here's where the fun really begins...
🍳 Step-by-Step Instructions
Preheat your oven to 350°F (175°C) and lightly grease a 9‑inch springform pan with butter, then line the bottom with parchment paper. This ensures the cake releases easily and prevents any sticky situations later on. While the oven warms, take a moment to inhale the aroma of the butter as it softens—this is the first sign that something delicious is about to happen. The heat will also help the pan achieve a golden crust on the edges, which adds a beautiful visual contrast.
In a large mixing bowl, whisk together 2 cups of all‑purpose flour, 1 ½ teaspoons of baking powder, ½ teaspoon of salt, and 2 teaspoons of ground cinnamon. The dry ingredients should be evenly combined, with the cinnamon speckles visible like tiny fireworks. This step is crucial because it distributes the leavening agents uniformly, preventing any pockets of dense batter. Once mixed, set the bowl aside and let the fragrant scent of cinnamon fill your kitchen.
In a separate saucepan, melt ½ cup (1 stick) of unsalted butter over low heat. Once melted, remove from heat and let it cool for a minute, then stir in ¾ cup of granulated sugar and ¼ cup of brown sugar until the mixture is glossy and slightly thickened. This caramelization step adds depth to the overall flavor and creates a subtle caramel note that pairs beautifully with the apples. The mixture should look like a thick syrup—if it’s too runny, give it a minute longer on low heat.
Add 2 large eggs, one at a time, to the butter‑sugar mixture, whisking vigorously after each addition. The batter should become smooth and slightly pale. Then stir in ½ cup of milk and 1 teaspoon of pure vanilla extract, mixing just until combined. The key here is to avoid over‑mixing; you want the batter to stay airy, not develop gluten, which would make the cake tough.
Gently fold the dry ingredient mixture into the wet batter using a rubber spatula. Use a gentle “cut‑and‑fold” motion, turning the bowl over and over until no streaks of flour remain. This technique preserves the air you incorporated when whisking the eggs, ensuring a fluffy interior. You’ll notice the batter turning a beautiful golden hue, with the cinnamon speckles creating a marbled effect.
While the batter rests, toss 3 medium apples (peeled, cored, and sliced thin) with a drizzle of the remaining melted butter, a sprinkle of cinnamon, and a pinch of sugar. Spread the apple slices evenly across the bottom of the prepared pan, allowing them to form a natural “layer” that will become the cake’s flavorful base. The apples should be arranged so that each bite gets a piece of fruit, but not so crowded that they prevent the batter from rising.
Pour the batter over the apple layer, using a spatula to smooth the top. The batter will sink slightly around the apples, creating a beautiful ripple effect. Place the pan in the preheated oven and bake for 30‑35 minutes, or until a toothpick inserted into the center comes out clean and the top is a deep golden brown. You’ll hear a faint crackle as the edges start to caramelize, releasing an intoxicating aroma that fills the kitchen.
Once baked, remove the cake from the oven and let it cool in the pan for 10 minutes. Then, run a thin knife around the edges to loosen the cake, and carefully release the springform. Transfer the cake onto a wire rack to cool completely; this prevents the bottom from becoming soggy from trapped steam. While it cools, dust the top with a generous amount of powdered sugar for a snowy finish that looks as inviting as it tastes.
And there you have it! But before you dig in, let me share some tips that will take this from great to absolutely unforgettable...
🔐 Expert Tips for Perfect Results
The Taste Test Trick
Before you bake, give the batter a quick taste. You’ll notice a subtle sweetness and a warm spice note—if it feels a little flat, add a pinch more cinnamon or a splash of honey. This tiny adjustment can make a world of difference, especially if your apples are on the tart side. Trust me, a quick taste test saves you from a bland final product and adds confidence to the process.
Why Resting Time Matters More Than You Think
Allowing the batter to rest for five minutes after combining wet and dry ingredients isn’t just a suggestion; it’s a science. During this brief pause, the flour hydrates fully, and the gluten relaxes, resulting in a softer crumb. I once rushed this step and ended up with a cake that felt a bit dense—after adding the rest, the texture transformed into a cloud‑like softness.
The Seasoning Secret Pros Won’t Tell You
A dash of sea salt right before baking can amplify the sweetness and bring out the apple’s natural flavor. Professionals often sprinkle a pinch on top of the batter just before it goes into the oven, creating a subtle contrast that makes the palate sing. It’s a small detail, but it elevates the entire cake from good to restaurant‑level.
How to Keep the Apples From Sogginess
Toss the apple slices with a light coating of flour before adding them to the pan. This creates a barrier that absorbs excess moisture, preventing the bottom of the cake from becoming soggy. I discovered this trick after a batch turned out a bit mushy, and now it’s a non‑negotiable step in my kitchen.
The Cool‑Down Secret
Resist the urge to slice the cake while it’s still warm. Letting it rest on a wire rack for at least 30 minutes lets the crumb set, making clean slices easier to achieve. Cutting too early can cause the cake to crumble, ruining the beautiful presentation you worked so hard to create.
Serving with a Twist
A dollop of lightly sweetened whipped cream or a scoop of vanilla ice cream adds a luxurious contrast to the warm cake. If you want to go a step further, drizzle a quick caramel sauce made from butter, brown sugar, and a splash of heavy cream. This simple addition turns a humble cake into a show‑stopping dessert that impresses guests without extra effort.
🌈 Delicious Variations to Try
One of my favorite things about this recipe is how versatile it is. Here are some twists I’ve tried and loved:
Nutty Crunch Delight
Add ½ cup of toasted chopped walnuts or pecans to the batter for a satisfying crunch. The nuts bring a buttery richness that complements the apples, and their earthy flavor deepens the overall profile. Sprinkle a few extra nuts on top before baking for an attractive, crunchy crown.
Berry‑Infused Bliss
Fold in ½ cup of fresh or frozen cranberries or raspberries along with the apples. The tart berries contrast beautifully with the sweet cake, creating bursts of flavor that keep each bite interesting. If using frozen berries, toss them in a tablespoon of flour first to prevent excess moisture.
Caramel Apple Swirl
Swirl in ¼ cup of store‑bought or homemade caramel sauce into the batter before baking. The caramel creates ribbons of gooey sweetness that melt into the cake as it bakes, resulting in pockets of liquid gold. This variation is perfect for special occasions when you want to wow your guests.
Spiced Orange Zest
Add the zest of one orange and a splash of orange juice to the wet ingredients. The citrus brightens the spice and adds a fragrant note that lifts the entire dessert. It’s a subtle change, but the aroma of orange and cinnamon together is unforgettable.
Gluten‑Free Almond Flour Version
Replace the all‑purpose flour with an equal amount of almond flour for a nutty, gluten‑free alternative. Almond flour adds moisture and a delicate crumb, while still allowing the apples to shine. You might need to add an extra egg or a tablespoon of xanthan gum to help with structure.
Vegan Coconut Cream Frosting
Top the cooled cake with a swirl of coconut cream whipped with a bit of maple syrup and vanilla. This vegan frosting adds a light, airy finish that pairs perfectly with the warm spices. It also makes the cake suitable for guests with dairy restrictions without sacrificing richness.
📦 Storage & Reheating Tips
Refrigerator Storage
Store any leftovers in an airtight container or wrap the cake tightly with plastic wrap. It will stay fresh for up to four days in the fridge. Before serving, let it come to room temperature for about 20 minutes, or gently warm a slice in the microwave for 15 seconds to revive the soft crumb.
Freezing Instructions
Wrap the cooled cake tightly in a double layer of foil and then place it in a freezer‑safe zip‑top bag. It can be frozen for up to three months without losing flavor. To thaw, move the cake to the refrigerator overnight, then let it sit at room temperature for a short while before serving.
Reheating Methods
The trick to reheating without drying it out? A splash of milk or a drizzle of melted butter brushed onto the top before warming. Place a slice on a baking sheet and heat it in a 300°F (150°C) oven for 8‑10 minutes, or microwave for 20‑30 seconds. This gentle heat restores the cake’s moisture and brings the fragrant spices back to life.