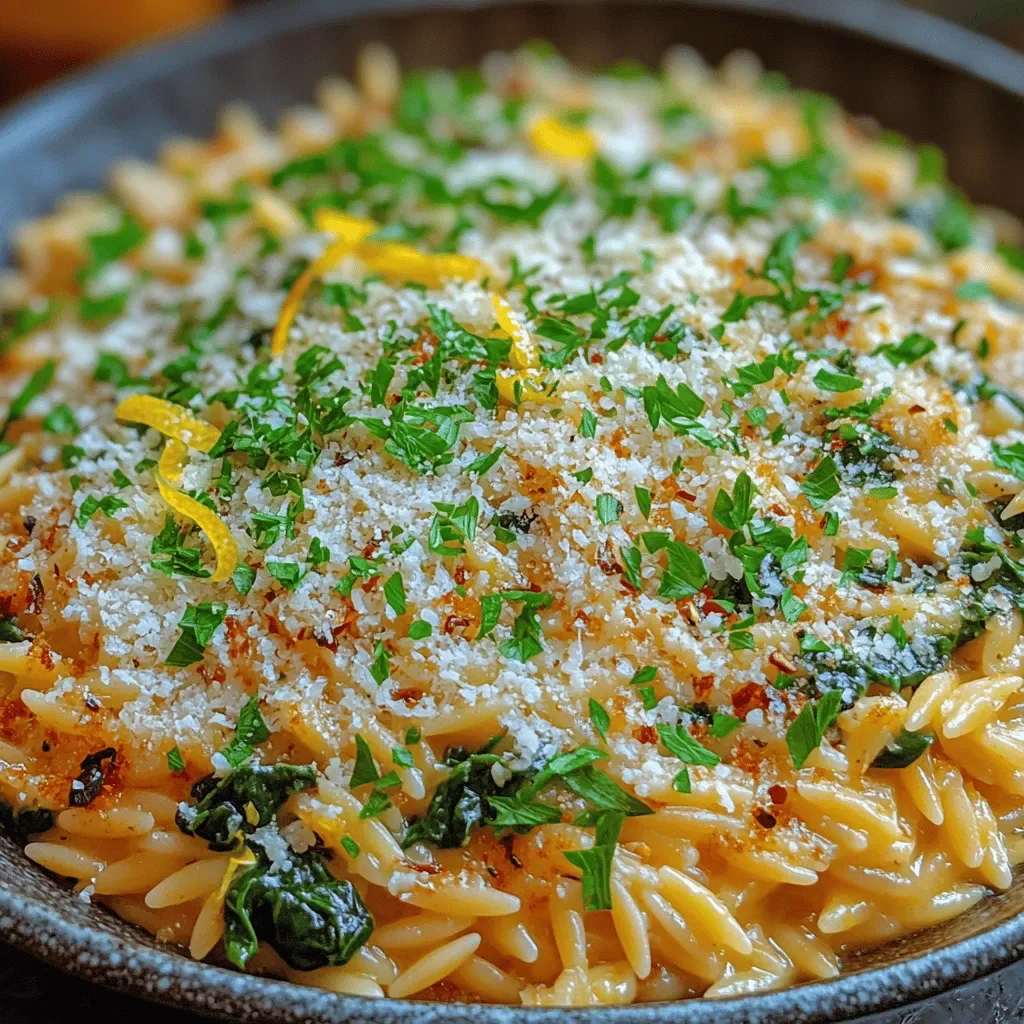
It was a crisp Saturday afternoon in early autumn, the kind of day when the kitchen smells like a promise of comfort and the sky outside is a soft, buttery gray. I was rummaging through my pantry, trying to decide what to throw together for dinner, when a bottle of aged balsamic vinegar caught my eye. I remembered the first time I tried a simple balsamic glaze on roasted vegetables—how the sweet‑tart tang made every bite sing—and I thought, “What if I could marry that magic with juicy chicken and a hearty grain, all in one pan?” The thought sent a little thrill through me, as if I’d just uncovered a secret shortcut to a restaurant‑quality plate. The moment you lift the lid, a cloud of fragrant steam hits you, carrying whispers of caramelized onions, garlic, and that unmistakable balsamic perfume that makes your mouth water before you even taste the first forkful.
I’ve always believed that the best meals are the ones that feel like a warm hug after a long day, and this One‑Pan Balsamic Chicken Orzo with Vegetables delivers exactly that. The chicken stays tender and juicy, the orzo soaks up the glossy, glossy sauce, and the vegetables stay bright and crisp—each element playing off the other in perfect harmony. The best part? You only need one pan, which means less mess, less time, and more time to sit down with your loved ones and actually enjoy the food. Imagine the sizzle as the chicken browns, the sweet pop of cherry tomatoes bursting, and the gentle hiss of the orzo simmering—each sound a promise of the flavor explosion that’s about to unfold.
But wait—there’s a secret trick in step four that will turn this dish from simply good to absolutely unforgettable. Have you ever wondered why restaurant versions of balsamic chicken taste so different from the home‑cooked versions? The answer lies in a tiny detail that most home cooks overlook, and I’m about to spill the beans. Trust me, once you master that little nuance, you’ll never look at a bottle of balsamic the same way again. And the best part? The whole process takes less than an hour, making it perfect for busy weeknights or relaxed weekend feasts alike.
Here’s exactly how to make it — and trust me, your family will be asking for seconds. Grab a pan, gather the ingredients, and let’s embark on a culinary adventure that will fill your home with aroma, color, and the kind of satisfaction that only a well‑executed one‑pan wonder can provide. Ready? Let’s dive in.
🌟 Why This Recipe Works
- Flavor Depth: The combination of balsamic vinegar, chicken broth, and a touch of honey creates a layered sauce that balances sweet, tangy, and savory notes, making each bite a complex experience.
- Texture Harmony: Golden‑brown chicken thighs provide a satisfying bite, while the orzo absorbs the sauce and stays tender, and the vegetables retain a slight crunch, offering a delightful contrast.
- Ease of Execution: Everything cooks in a single pan, which means fewer dishes, less cleanup, and a streamlined cooking process that even beginners can master.
- Time Efficiency: With a prep time of just 15 minutes and a cooking time of 30, you can have a wholesome, restaurant‑style dinner on the table in under an hour.
- Versatility: Swap out vegetables based on season or personal preference, and you can even replace chicken with turkey or tofu for a different protein profile.
- Nutrition Boost: Packed with lean protein, whole‑grain orzo, and a colorful medley of vegetables, this dish offers balanced macros and a burst of vitamins.
- Ingredient Quality: Using fresh herbs, high‑quality balsamic, and free‑range chicken elevates the dish from everyday to special‑occasion worthy.
- Crowd‑Pleaser Factor: The familiar flavors of chicken and balsamic appeal to a wide range of palates, making it perfect for family meals or casual gatherings.
🥗 Ingredients Breakdown
The Foundation
The backbone of this dish is boneless, skinless chicken thighs. I prefer thighs over breasts because they stay moist and develop a richer flavor when seared. Look for thighs that have a uniform thickness; if they’re uneven, gently pound them so they cook evenly. If you’re aiming for a leaner version, you can use chicken breast, but be mindful not to overcook it, or you’ll lose that juicy texture.
Orzo is the grain that ties everything together. Its rice‑like shape allows it to absorb the sauce while still maintaining a pleasant bite. I always rinse the orzo briefly before cooking to remove any excess starch, which helps prevent it from becoming gummy. For a gluten‑free alternative, try using quinoa or rice, though the texture will shift slightly.
Aromatics & Spices
Garlic and onion are the aromatic duo that form the flavor base. Fresh garlic cloves, minced finely, release a sweet, pungent aroma when they hit the hot pan. The onion, diced into small pieces, softens and caramelizes, adding a subtle sweetness that balances the balsamic’s acidity. If you love a deeper flavor, try adding a pinch of smoked paprika alongside the garlic.
Dried oregano and Italian seasoning bring a Mediterranean flair, while freshly cracked black pepper adds a gentle heat. Salt is essential, but remember to season in layers—start with the chicken, then the vegetables, and finish with a final pinch after the sauce reduces. This technique ensures every component is seasoned perfectly.
The Secret Weapons
Balsamic vinegar is the star of the show, providing that sweet‑tart backbone. Choose a high‑quality, aged balsamic for a richer, more complex flavor; cheaper varieties can taste overly sharp. A drizzle of honey or maple syrup balances the acidity, creating a glossy glaze that coats every bite. If you’re watching sugar, you can reduce the honey to a teaspoon and still achieve a beautiful balance.
Chicken broth (low‑sodium) is the liquid that helps the orzo cook and the sauce develop. It infuses the grain with savory depth and prevents the dish from drying out. For a richer mouthfeel, substitute half of the broth with white wine or a splash of apple cider vinegar for a bright note.
Finishing Touches
Fresh basil and a generous sprinkle of grated Parmesan cheese finish the dish with herbaceous brightness and a salty umami kick. The basil should be added at the end, just before serving, to preserve its aromatic oils. Parmesan melts into the sauce, thickening it and adding a nutty richness that ties all the flavors together.
A final drizzle of extra‑virgin olive oil adds a silky mouthfeel and a hint of fruitiness. If you enjoy a little heat, a pinch of red‑pepper flakes can be tossed in with the vegetables for a subtle kick that awakens the palate.
With your ingredients prepped and ready, let's get cooking. Here's where the fun really begins...
🍳 Step-by-Step Instructions
-
Heat a large, heavy‑bottomed skillet over medium‑high heat and add two tablespoons of olive oil. Once the oil shimmers, place the chicken thighs in the pan, skin side down if using skin‑on, and let them sear undisturbed for about 4‑5 minutes. You’ll hear a satisfying sizzle, and the edges will turn golden brown, releasing a fragrant aroma that fills the kitchen.
Flip the chicken and season both sides with salt, pepper, and a pinch of dried oregano. Cook for another 3‑4 minutes until the second side develops a beautiful crust. Remove the chicken and set it aside on a plate; this step builds a flavor base that we’ll return to later.
-
In the same pan, add the diced onion and sauté for 2‑3 minutes until it becomes translucent and slightly sweet. Then, stir in the minced garlic and cook for an additional 30 seconds—watch closely, because garlic can go from fragrant to burnt in a heartbeat.
Now, toss in the chopped carrots, bell pepper, zucchini, and a handful of cherry tomatoes. Sprinkle a little salt and pepper, and let the vegetables soften for about 5 minutes, stirring occasionally. You’ll notice the colors intensify and the vegetables release a gentle steam, signaling they’re ready for the next phase.
💡 Pro Tip: If you want the vegetables to retain a firmer bite, add them in two stages—harder veggies like carrots first, then softer ones like zucchini later. -
Return the chicken to the pan, nestling the pieces among the vegetables. Pour in the balsamic vinegar, letting it sizzle and deglaze the browned bits stuck to the bottom. This is where the magic starts—those caramelized bits are flavor gold.
Stir in the honey, then add the chicken broth and a splash of white wine (if using). Bring the mixture to a gentle boil, then reduce the heat to a simmer. The sauce should begin to thicken, coating the chicken and vegetables with a glossy sheen.
-
Sprinkle the orzo evenly over the pan, making sure it’s submerged in the liquid. Cover the skillet with a tight‑fitting lid and let it simmer for 12‑15 minutes, or until the orzo is tender and has absorbed most of the liquid.
Here’s the secret: give the pan a gentle shake once or twice during cooking. This helps the orzo toast slightly, adding a subtle nutty flavor, and prevents it from sticking to the bottom.
⚠️ Common Mistake: Lifting the lid too often releases steam and can cause the orzo to dry out. Trust the timer and keep the lid on until the orzo is cooked through. -
Once the orzo is perfectly al dente, remove the pan from heat. Sprinkle the grated Parmesan over the top, allowing it to melt into the sauce, creating a velvety texture.
Finish with a generous handful of fresh basil leaves, torn just before serving to release their aromatic oils. The basil’s bright green hue adds a visual pop that makes the dish look as good as it tastes.
-
Give everything a gentle toss, ensuring the chicken, vegetables, and orzo are evenly coated with the balsamic glaze. Taste and adjust seasoning with a pinch more salt or a drizzle of extra balsamic if you prefer a tangier profile.
Let the dish rest for two minutes; this short resting period allows the flavors to meld and the sauce to thicken just a touch more.
-
Serve the One‑Pan Balsamic Chicken Orzo hot, directly from the skillet or transferred to a serving platter. The dish is already a complete meal, but if you’d like, add a side of crusty bread to soak up any remaining sauce.
Encourage everyone to dig in with a spoon or fork, and watch as they marvel at the vibrant colors and inhale the intoxicating aroma. Go ahead, take a taste — you’ll know exactly when it’s right.
-
Store any leftovers in an airtight container. The flavors actually deepen after a night in the fridge, making tomorrow’s lunch just as exciting as dinner.
When reheating, add a splash of broth or water and cover the pan to steam the dish back to life without drying it out.
And there you have it! But before you dig in, let me share some tips that will take this from great to absolutely unforgettable...
🔐 Expert Tips for Perfect Results
The Taste Test Trick
Always taste the sauce before adding the final splash of balsamic. If it feels too sharp, balance it with a pinch of sugar or a drizzle of honey. Trust your palate—if it sings, you’re on the right track.
Why Resting Time Matters More Than You Think
Allow the dish to sit for a couple of minutes after cooking. This resting period lets the juices redistribute throughout the chicken and orzo, ensuring each bite is moist and flavorful. I once rushed straight to the table and missed that subtle silkiness.
The Seasoning Secret Pros Won’t Tell You
Season in layers. Sprinkle a little salt on the chicken, then again on the vegetables, and finish with a final pinch after the sauce reduces. This technique builds depth without ever making the dish taste salty.
Mastering the Sear
Pat the chicken dry with paper towels before it hits the pan. Moisture is the enemy of a good sear; a dry surface caramelizes quickly, creating that coveted crust. I once forgot this step and ended up with soggy chicken—lesson learned.
The Finish with Fresh Herbs
Add fresh basil right at the end, not during cooking. Heat destroys its delicate flavor, so a final toss preserves its bright, peppery notes. If you love a herbaceous punch, try a sprinkle of chopped parsley as well.
🌈 Delicious Variations to Try
One of my favorite things about this recipe is how versatile it is. Here are some twists I've tried and loved:
Mediterranean Sunshine
Swap the zucchini for eggplant and add kalamata olives and sun‑dried tomatoes. The olives bring briny richness, while the sun‑dried tomatoes intensify the sweet‑tart profile, turning the dish into a Mediterranean getaway on a plate.
Spicy Southwest
Introduce a teaspoon of chipotle in adobo sauce with the garlic, and replace the basil with cilantro. The smoky heat pairs beautifully with the balsamic, and a squeeze of lime just before serving brightens the whole dish.
Creamy Mushroom Delight
Add sliced cremini mushrooms after the onions and let them brown before adding the broth. Finish with a splash of heavy cream and a sprinkle of thyme for an indulgent, velvety twist.
Herb‑Infused Quinoa
Replace orzo with quinoa for a gluten‑free version. Toss in fresh rosemary and thyme with the broth; the quinoa absorbs the herbaceous notes, creating a nutty, aromatic base.
Cheesy Bake
After the orzo is cooked, transfer the skillet to a preheated oven, sprinkle shredded mozzarella on top, and broil until bubbly and golden. The cheese forms a crispy crust that adds a delightful textural contrast.
📦 Storage & Reheating Tips
Refrigerator Storage
Allow the dish to cool to room temperature for no more than two hours, then transfer it to an airtight container. It will keep fresh for up to four days. For best texture, store the sauce separately if you plan to reheat later.
Freezing Instructions
Portion the cooled dish into freezer‑safe bags or containers, leaving a little headspace for expansion. It freezes well for up to three months. When ready to use, thaw overnight in the fridge and reheat gently on the stove, adding a splash of broth to revive the sauce.
Reheating Methods
The safest way to reheat is on the stovetop over low heat, stirring occasionally and adding a tablespoon of water or broth to prevent drying. Alternatively, you can microwave in short bursts, covering the dish with a damp paper towel to retain moisture.