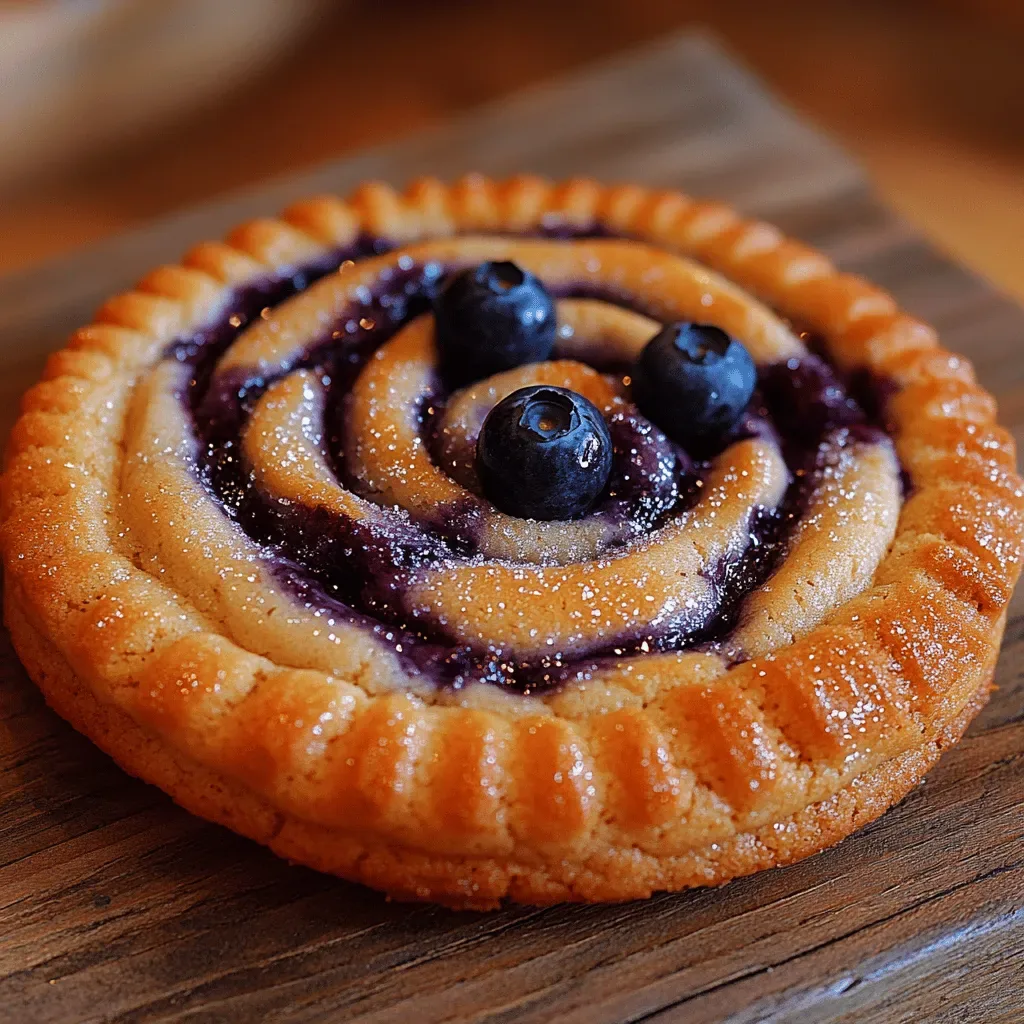
The first time I ever baked cookies for Valentine’s Day, I was a nervous teenager trying to impress my crush with something sweet and simple. I remember the kitchen humming with the soft whirr of the mixer, the buttery scent swirling like a warm hug, and the way the sunlight filtered through the curtains, casting a golden glow on the flour‑dusted countertop. When the timer chimed, I lifted the lid to reveal a tray of perfectly round, pink‑blushed cookies that seemed to sparkle with a promise of love. That moment sparked a tradition in my family that has now become a beloved annual ritual, and it’s why I’m sharing this recipe with you today.
There’s something magical about a cookie that’s crisp on the edges, melt‑in‑your‑mouth soft in the center, and dressed in a delicate swirl of icing that looks like a tiny heart. The aroma of melted butter and vanilla fills the air, creating an almost cinematic scene that makes you want to pause and savor every second. Imagine the sound of the cookies gently cracking as you bite into them, the subtle crunch giving way to a buttery melt that coats your palate with sweet nostalgia. The texture is a love story in itself—crisp, tender, and just a little crumbly—all at once.
What makes these Valentine Butter Cookies truly irresistible is the balance of simple pantry staples and a few secret tricks that elevate them from ordinary to unforgettable. You’ll discover why the temperature of your butter matters, how a pinch of salt can amplify sweetness, and the surprising power of letting the dough rest before baking. But wait—there’s a hidden ingredient that most home bakers overlook, and it’s the key to that melt‑in‑your‑mouth texture we all crave. I’ll reveal that secret later, so keep reading!
Here’s exactly how to make it — and trust me, your family will be asking for seconds, your friends will beg for the recipe, and you’ll feel like a culinary cupid every time you pull a fresh batch from the oven. Ready to dive in? Let’s get those mixing bowls out, preheat the oven, and start a love affair with butter, sugar, and a dash of romance.
🌟 Why This Recipe Works
- Flavor Depth: The combination of unsalted butter and granulated sugar creates a caramelized backbone that feels richer than a simple sugar cookie. As the butter melts, it releases fatty notes that carry the vanilla and any decorative icing into every bite.
- Texture Harmony: By using a precise balance of flour and butter, the cookies achieve a crisp edge while staying tender inside. The secret lies in the gentle folding technique that prevents over‑development of gluten.
- Ease of Execution: This recipe requires only one bowl for the wet ingredients and a second for the dry, making cleanup a breeze. Even novice bakers can follow the steps without feeling overwhelmed.
- Time Efficiency: With a total time of just 45 minutes, you can whip up a batch of love‑filled cookies while the TV show you’re watching rolls into its commercial break. The dough doesn’t need an overnight chill, though a short rest makes a difference.
- Versatility: The base cookie is a perfect canvas for any decorative icing, sprinkles, or even a drizzle of melted chocolate. You can switch up the flavor profile for holidays, birthdays, or a simple afternoon treat.
- Ingredient Quality: Using high‑quality unsalted butter and pure vanilla extract ensures that each component shines. The subtle salt amplifies sweetness without making the cookies taste salty.
- Crowd‑Pleasing Factor: The classic shape and soft pink hue instantly signal a Valentine’s treat, making them a hit at parties, school events, or a quiet night in with a loved one.
- Nutrition Balance: While indulgent, the cookies provide a modest amount of protein from the egg and a comforting dose of carbs that satisfy cravings without feeling overly heavy.
🥗 Ingredients Breakdown
The Foundation
The backbone of any good cookie is butter, and in this recipe we use one cup of unsalted butter, softened to room temperature. Softened butter incorporates smoothly with sugar, creating a light, airy batter that traps tiny air bubbles—these become the pockets of melt‑in‑your‑mouth goodness when baked. If you’re using salted butter, simply reduce the added salt to a pinch to avoid an overly salty flavor.
Sweetening the Moment
Granulated sugar not only sweetens but also contributes to the cookie’s crisp edges. As the sugar caramelizes in the oven, it forms a thin, golden crust that crackles delightfully under your teeth. For a deeper flavor, you could substitute half of the granulated sugar with brown sugar, but keep in mind that this will introduce a subtle molasses note.
Binding & Flavor Boosters
A single large egg acts as the binding agent, holding the flour and butter together while adding a touch of richness. The two teaspoons of vanilla extract are the unsung hero, infusing the dough with a warm, aromatic backdrop that makes the cookies unforgettable. If you’re feeling adventurous, a splash of almond extract can add a nutty nuance without overpowering the vanilla.
The Structure Builders
All‑purpose flour provides the necessary framework, and at three cups it gives the cookies enough body to hold their shape while still remaining tender. The half‑teaspoon of salt is crucial—it balances the sweetness and accentuates the butter’s flavor. When measuring flour, spoon it into the cup and level it off; packing it can lead to dense, heavy cookies.
Finishing Touches
The optional decorative icing or sprinkles are where you can get creative. A simple glaze of powdered sugar mixed with a touch of milk and pink food coloring can turn these cookies into heart‑shaped love tokens. If you prefer a crunch, sprinkle colorful non‑pareve confetti on the dough before baking; it will stick to the surface as the cookies bake, adding a festive pop.
With your ingredients prepped and ready, let's get cooking. Here's where the fun really begins...

🍳 Step-by-Step Instructions
-
Preheat your oven to 350°F (175°C) and line two baking sheets with parchment paper. While the oven warms, take a moment to admire the butter as it softens on the countertop; this is the first step toward that melt‑in‑your‑mouth texture we all crave. The parchment will prevent sticking and give you a clean release, which is essential for a smooth finish. Have your mixing bowls ready, because the next step moves quickly.
💡 Pro Tip: If your kitchen is warm, place the butter in the fridge for 5 minutes before softening; this prevents it from becoming too oily. -
In a large bowl, cream together the softened butter and granulated sugar using a handheld mixer on medium speed. Watch as the mixture lightens in color and becomes fluffy—this process incorporates air, which is the secret to a light crumb. Scrape down the sides of the bowl with a silicone spatula to ensure every speck of butter is fully combined. The scent of sweet butter will start to fill the kitchen, hinting at the deliciousness to come.
-
Add the large egg and vanilla extract to the creamed butter‑sugar mixture. Beat until the egg is fully incorporated and the batter looks glossy and smooth. This is the moment where the dough starts to come together, and you’ll notice a slight thickening as the egg binds everything. If you’re using almond extract, add it now for an extra layer of flavor.
⚠️ Common Mistake: Over‑mixing after adding the egg can develop too much gluten, leading to tough cookies. Mix just until combined. -
In a separate bowl, whisk together the all‑purpose flour, salt, and (if using) any optional spices like a pinch of cinnamon. Whisking aerates the flour, ensuring a uniform distribution of the salt, which prevents pockets of salty bursts. Gradually add the dry mixture to the wet ingredients, stirring with a wooden spoon or spatula on low speed. The dough will start to come together in a shaggy mass—don’t worry, that’s exactly what we want.
💡 Pro Tip: Stop mixing as soon as the flour is just incorporated; the dough should be soft but not sticky. -
Turn the dough out onto a lightly floured surface and gently knead it just a few times—think of it as a brief handshake between ingredients. This step smooths the dough and makes it easier to roll. If the dough feels too sticky, sprinkle a tiny amount of extra flour, but be careful not to add too much, or the cookies will become dry. Now, form the dough into a log about 2 inches in diameter and wrap it in plastic wrap.
Here’s the thing: chilling the dough for at least 20 minutes (or up to an hour) dramatically improves shape retention during baking. The butter firms up, and the cookies keep their cute heart‑shaped silhouettes instead of spreading into flat discs.
-
While the dough chills, prepare a small bowl of decorative icing if you plan to drizzle after baking. A simple glaze can be made by whisking together powdered sugar, a splash of milk, and a few drops of pink food coloring. Set this aside, because the moment the cookies come out of the oven, you’ll want to coat them while they’re still warm for a glossy finish.
-
Remove the chilled dough from the fridge and slice it into ¼‑inch thick rounds using a sharp cookie cutter or a small biscuit cutter. If you’re feeling extra romantic, use a heart‑shaped cutter for a true Valentine vibe. Place the cutouts onto the prepared baking sheets, leaving about 2 inches of space between each cookie to allow for spreading.
Now, here's where it gets interesting: lightly tap the baking sheet on the counter to settle the cookies, ensuring they lie flat and even. If you want a decorative edge, gently press the edge of a fork into each cookie before baking; this creates a subtle ridge that holds icing beautifully.
-
Bake the cookies for 12‑15 minutes, or until the edges turn a light golden brown and the tops are just set. You’ll notice a faint aroma of butter and vanilla wafting through the kitchen—if you can’t resist, take a quick peek, but be careful not to open the oven too early. When the cookies are done, remove them from the oven and let them cool on the sheet for 2 minutes before transferring to a wire rack.
And the result? A batch of soft‑centered, lightly crisp cookies that are perfect for decorating. While they’re still warm, drizzle the prepared icing, add sprinkles, or dust with powdered sugar. Let the glaze set for a few minutes, then serve.
⚠️ Common Mistake: Over‑baking turns these delicate cookies into hard biscuits. Keep a close eye after the 12‑minute mark; they’re done when the edges just start to turn golden.
And there you have it! But before you dig in, let me share some tips that will take this from great to absolutely unforgettable...
🔐 Expert Tips for Perfect Results
The Taste Test Trick
Before you bake the entire batch, pull off one cookie and bake it as a test. This allows you to gauge the exact level of crispness and adjust baking time by a minute or two. I once served a test cookie to my teenage niece, and she declared it “perfectly soft”—that feedback saved the rest of the batch from being over‑baked.
Why Resting Time Matters More Than You Think
Letting the dough rest in the fridge not only firms the butter but also allows the flour to fully hydrate. This hydration creates a more tender crumb and prevents the cookies from spreading too much. Trust me on this one: the extra 20‑minute chill makes a noticeable difference in shape and texture.
The Seasoning Secret Pros Won’t Tell You
A pinch of fine sea salt sprinkled on top just before baking can amplify the sweetness and add a subtle crunch. Professional bakers often keep a small dish of flaky salt at the ready for this exact purpose. The result is a cookie that sings with balanced flavor, rather than being one‑dimensional sweet.
Butter Temperature is Everything
If the butter is too warm, it will melt into the dough, leading to flat, greasy cookies. Conversely, if it’s too cold, it won’t incorporate properly, leaving pockets of unmixed butter. The sweet spot is room temperature—soft enough to blend, but still firm enough to hold its shape.
Decorating While Warm
Applying icing while the cookies are still warm helps the glaze set with a glossy sheen and prevents it from sliding off. A quick tip: dip the tip of a pastry brush in the glaze and swirl it gently over each cookie for an elegant finish. I once tried decorating after the cookies cooled completely, and the icing just slid off like water on wax.
🌈 Delicious Variations to Try
One of my favorite things about this recipe is how versatile it is. Here are some twists I've tried and loved:
Chocolate‑Dipped Hearts
After the cookies have cooled, dip half of each heart in melted dark chocolate and let it set on parchment. The bitterness of the chocolate pairs beautifully with the sweet butter base, creating a sophisticated bite.
Citrus Zest Spark
Add a teaspoon of finely grated orange or lemon zest to the dough for a bright, aromatic lift. The citrus notes cut through the richness and make the cookies feel lighter, perfect for spring celebrations.
Nutty Crunch
Fold in a quarter cup of finely chopped toasted almonds or hazelnuts into the dough before shaping. The nuts add a satisfying crunch and a nutty depth that complements the buttery flavor.
Spiced Romance
Incorporate a pinch of ground cinnamon, a dash of ground ginger, and a whisper of nutmeg into the flour mixture. This warm spice blend gives the cookies a cozy, comforting feel—ideal for a chilly February evening.
Berry‑Infused Glaze
Mix a tablespoon of raspberry puree into the icing for a pink‑tinted, tangy glaze. The fruitiness adds a fresh contrast to the sweet cookie, and the color looks stunning on a platter.
Salted Caramel Drizzle
Swap the simple powdered sugar glaze for a thin salted caramel sauce. Drizzle it over the cooled cookies and sprinkle a pinch of flaky sea salt on top. The sweet‑salty combo is addictive and elevates the cookies to a gourmet level.
📦 Storage & Reheating Tips
Refrigerator Storage
Place the cooled cookies in an airtight container lined with parchment paper. Store them in the refrigerator for up to one week; the cool environment keeps the butter from going rancid and preserves the soft interior. If you’re stacking layers, separate them with additional parchment sheets to prevent sticking.
Freezing Instructions
These cookies freeze beautifully. Arrange them in a single layer on a baking sheet, freeze until solid, then transfer to a zip‑top freezer bag. They’ll stay fresh for up to three months. When you’re ready to enjoy, let them thaw at room temperature for 15 minutes, then re‑warm gently.
Reheating Methods
To bring back that fresh‑out‑of‑the‑oven softness, place the cookies on a baking sheet and warm them in a 300°F (150°C) oven for 5‑7 minutes. The trick to reheating without drying them out? A splash of water in a small pan on the oven floor creates a humid environment, keeping the cookies moist.