It was a rainy Thursday evening when I first stumbled upon the secret that turned an ordinary weeknight dinner into a celebration of flavor. I was rummaging through the pantry, listening to the soft patter of raindrops against the window, when a jar of honey caught my eye. The golden liquid glistened like sunshine trapped in glass, and I imagined it mingling with the savory aroma of garlic that always seemed to linger in my kitchen. As I lifted the lid, a cloud of sweet, floral perfume rose, instantly making my stomach rumble with anticipation.
That night, I decided to combine the honey’s mellow sweetness with the bold, pungent kick of fresh garlic, and the result was nothing short of magical. The chicken thighs, with their rich, dark meat and crisp skin, soaked up the sauce until each bite was a perfect balance of sticky glaze and juicy tenderness. The moment the first piece hit my tongue, the flavors exploded—there was a caramelized crunch, a subtle tang, and a lingering warmth that made me close my eyes and savor every nuance. Have you ever wondered why restaurant versions of honey garlic chicken taste so different? The answer lies in the details, and I’m about to share every one of them with you.
What makes this recipe truly special isn’t just the ingredients; it’s the method that layers flavors like a symphony. From the moment the chicken hits the hot pan, you hear a satisfying sizzle that tells you the skin is rendering and the Maillard reaction is doing its work. Then, as the sauce bubbles and thickens, the kitchen fills with a scent that’s both comforting and exotic, inviting everyone to the table. But wait—there’s a secret trick in step four that will take the stickiness from good to irresistible, and I’ll reveal it just when you think you’ve got it all figured out.
Imagine serving this dish to your family, watching their eyes light up as they dip their forks into the glossy glaze, and hearing the chorus of “more, please!” echo around the dining room. It’s the kind of recipe that turns a simple dinner into a memory you’ll revisit again and again. Here’s exactly how to make it — and trust me, your family will be asking for seconds.
🌟 Why This Recipe Works
- Flavor Depth: The combination of honey and soy sauce creates a sweet‑salty balance that coats each thigh in a complex glaze, while garlic adds a pungent backbone that deepens the overall taste.
- Texture Harmony: By searing the skin first, you achieve a crispy, caramelized exterior that contrasts beautifully with the tender, juicy meat inside.
- Ease of Execution: This dish requires only a handful of pantry staples and a single skillet, making it perfect for busy weeknights without sacrificing gourmet quality.
- Time Efficiency: With a total cook time of about 45 minutes, you can have a restaurant‑level meal on the table faster than you can finish a Netflix episode.
- Versatility: Serve it over rice, quinoa, or cauliflower mash, or pair it with a fresh salad for a lighter option—the glaze adapts to any base you choose.
- Nutrition Boost: Using bone‑in, skin‑on thighs retains more nutrients and flavor, while the modest amount of honey provides natural sweetness without refined sugars.
- Ingredient Quality: Fresh garlic and ginger deliver aromatic oils that elevate the sauce beyond a simple glaze, making each bite aromatic and satisfying.
- Crowd‑Pleasing Factor: The glossy, sticky finish looks as good as it tastes, turning even the most skeptical eaters into fans of the dish.
🥗 Ingredients Breakdown
The Foundation
At the heart of this dish are bone‑in, skin‑on chicken thighs. Their higher fat content compared to breasts means they stay juicy and develop a luscious, caramelized crust when seared. When selecting thighs, look for pieces that are evenly sized and have a slight pink hue—this indicates freshness. If you’re aiming for a leaner version, you can trim excess skin, but remember you’ll lose some of that coveted crunch.
Aromatics & Spices
Garlic is the star aromatic here; its cloves should be minced finely so they melt into the sauce, releasing allicin that adds a sharp, lingering bite. Fresh ginger, grated, contributes a subtle heat that balances the honey’s sweetness, creating a dynamic flavor dance. Black pepper and a pinch of salt enhance the overall seasoning, while a splash of apple cider vinegar adds a bright acidity that cuts through the richness.
The Secret Weapons
Honey isn’t just a sweetener—it’s a natural caramelizer that gives the glaze its glossy sheen and sticky texture. Pair it with soy sauce, preferably low‑sodium, to bring umami depth without overwhelming saltiness. The cornstarch slurry is the unsung hero that thickens the sauce at just the right moment, turning a thin liquid into a velvety coating that clings to every curve of the thigh.
Finishing Touches
Green onions, sliced thin, add a fresh, oniony crunch that brightens the dish right before serving. A sprinkle of toasted sesame seeds introduces a nutty aroma and a pleasant textural contrast. These garnishes are optional but highly recommended for that restaurant‑style finish that makes the plate pop.
With your ingredients prepped and ready, let's get cooking. Here's where the fun really begins...

🍳 Step-by-Step Instructions
-
Pat the chicken thighs dry with paper towels, then season both sides generously with salt and black pepper. The dry surface is crucial for achieving that coveted crispy skin; moisture is the enemy of a good sear. As you sprinkle the seasoning, imagine a dusting of snow on a winter landscape—each grain adds texture and flavor. Let the seasoned thighs rest for five minutes while you heat the skillet; this short pause allows the salt to draw out a little moisture, which will later evaporate, concentrating the flavor.
💡 Pro Tip: Use a cast‑iron skillet for even heat distribution and a deeper sear. The heavier the pan, the better the crust. -
Heat 2 tablespoons of olive oil over medium‑high heat until it shimmers but does not smoke. Place the thighs skin‑side down, listening for that immediate sizzle that tells you the skin is beginning to render. Cook without moving them for about 6‑8 minutes, or until the skin turns a deep golden brown and releases easily from the pan. As the fat renders, it will pool in the pan, creating a natural cooking oil that will later flavor the sauce.
-
Flip the thighs and brown the flesh side for an additional 3‑4 minutes. This step seals in juices and adds a second layer of caramelization. While the meat browns, the aroma of rendered chicken fat mingles with the faint scent of garlic waiting to be added—trust your nose; it’s a reliable guide.
-
Reduce the heat to medium and add the minced garlic and grated ginger to the pan. Stir constantly for about 30 seconds, watching the garlic turn a light golden hue and release its fragrant steam. Be careful not to let it burn; burnt garlic turns bitter and can ruin the entire glaze. This brief sauté is where the magic begins, as the aromatics infuse the cooking fat, forming the base of your sauce.
-
Pour in 3 tablespoons of soy sauce, 3 tablespoons of honey, and 1 tablespoon of apple cider vinegar, stirring to combine. The mixture will bubble and hiss, creating a fragrant caramel that coats the pan. At this point, the sauce should start to thicken slightly—if it looks too thin, that’s a sign you’ll need the cornstarch slurry later. Trust me on this one: patience now prevents a watery finish later.
⚠️ Common Mistake: Adding the honey too early can cause it to burn. Always add honey after the garlic has softened. -
Return the chicken thighs to the pan, skin side up, and spoon some of the bubbling sauce over each piece. Reduce the heat to low and let the thighs simmer gently for 15‑20 minutes, turning once halfway through. You’ll notice the sauce clinging tighter, its color deepening to a rich amber. When the meat is cooked through (internal temperature of 165°F/74°C), the glaze will have thickened to a velvety sheen.
💡 Pro Tip: If the sauce looks too thick before the chicken is done, add a splash of water or chicken broth to loosen it, then let it reduce again. -
Stir the cornstarch slurry (1 tablespoon cornstarch mixed with 1 tablespoon cold water) into the pan, whisking quickly to avoid lumps. The sauce will instantly thicken, becoming glossy and clingy—exactly the texture you’re after. Let it bubble for another 2‑3 minutes, allowing the starch to fully gelatinize. This is the secret trick that makes the glaze irresistibly sticky; without it, the sauce would remain watery.
-
Remove the pan from heat and sprinkle sliced green onions and toasted sesame seeds over the top. The fresh green onions add a pop of color and a crisp bite, while the sesame seeds contribute a subtle nuttiness that rounds out the flavor profile. Give the thighs a final drizzle of any remaining glaze in the pan, ensuring every crevice is coated.
-
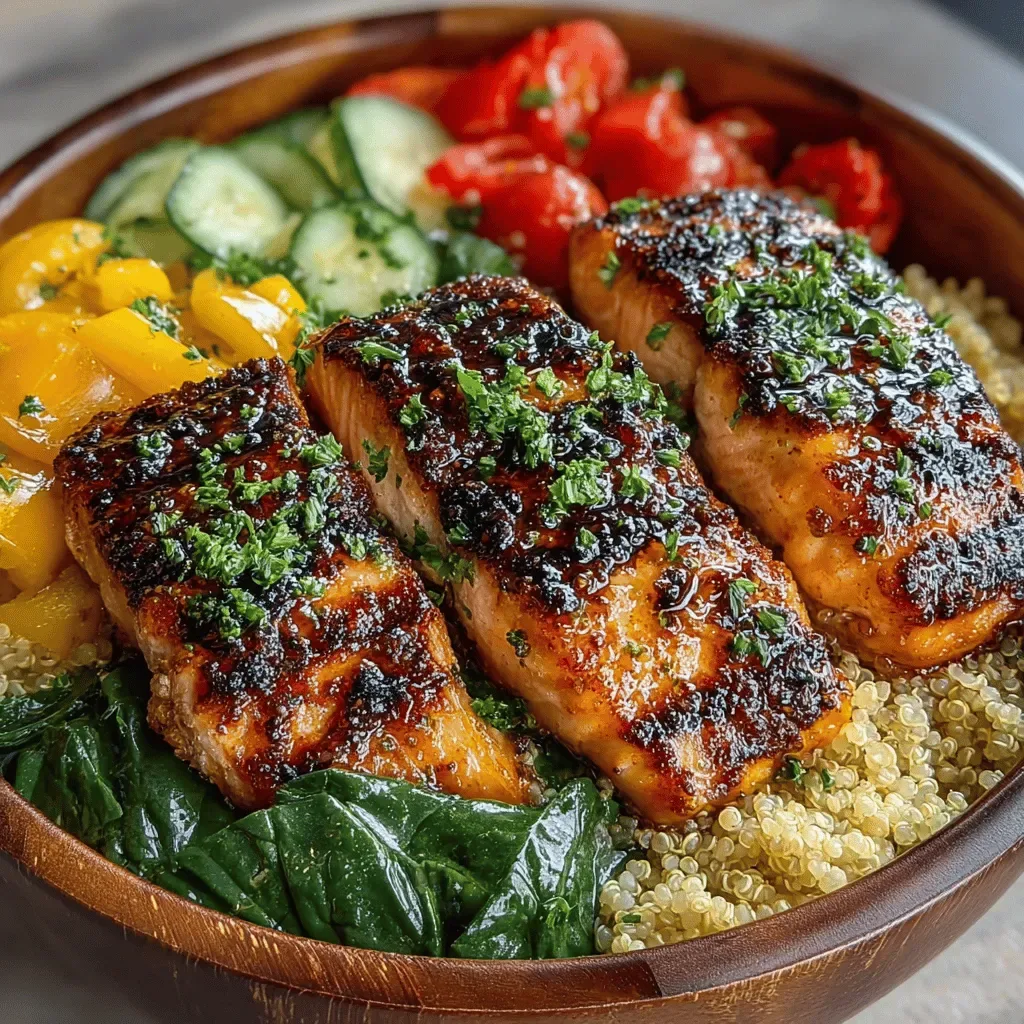
Serve the honey garlic chicken thighs hot, paired with steamed rice, roasted veggies, or a simple cucumber salad. As you place the first piece on a plate, notice the glossy sheen catching the light—an invitation to dig in. Go ahead, take a taste — you’ll know exactly when it’s right: the skin should be crisp, the meat juicy, and the sauce a perfect balance of sweet, salty, and tangy.
💡 Pro Tip: Let the chicken rest for 5 minutes after plating; this allows the juices to redistribute and the glaze to set, making each bite even more satisfying.
And there you have it! But before you dig in, let me share some tips that will take this from great to absolutely unforgettable...
🔐 Expert Tips for Perfect Results
The Taste Test Trick
Before you finish cooking, take a tiny spoonful of the sauce and let it cool for a second. If the flavor hits a perfect balance of sweet, salty, and tangy, you’re set. If it leans too sweet, a dash more soy sauce or a splash of vinegar will bring it back into harmony. Trust your palate; it’s the most reliable gauge.
Why Resting Time Matters More Than You Think
After the chicken is cooked, let it rest for at least five minutes. This short pause allows the fibers to relax and the juices to redistribute, preventing a dry bite. While the meat rests, the glaze continues to thicken slightly, coating the thighs even more evenly. The result? A juicier piece of chicken with a glossy, clingy finish.
The Seasoning Secret Pros Won’t Tell You
Adding a pinch of smoked paprika to the seasoning mix introduces a subtle smoky undertone that deepens the overall flavor. It’s a tiny addition, but it makes the dish feel more complex, like a chef’s special. I discovered this trick during a cooking class, and it’s become a staple in my pantry.
Control the Heat for the Perfect Glaze
Keeping the heat on low once the sauce is added prevents scorching and ensures a smooth, even coating. If the sauce boils too vigorously, it can separate, leaving a grainy texture. Adjust the flame as needed; a gentle simmer is all you need for that silky finish.
The Power of Fresh Ingredients
Fresh garlic and ginger release essential oils that dried versions simply can’t match. When you grate ginger, you’re extracting its juices directly, which infuse the sauce with brightness. I once used powdered garlic and the dish tasted flat—never again!
Finishing with a Splash of Citrus
A squeeze of fresh lemon or lime right before serving adds a burst of acidity that lifts the entire dish. The citrus cuts through the sweetness, making each bite feel lighter and more balanced. This tiny step is the secret behind many restaurant‑style honey garlic dishes.
🌈 Delicious Variations to Try
One of my favorite things about this recipe is how versatile it is. Here are some twists I've tried and loved:
Spicy Sriracha Kick
Stir in 1 tablespoon of sriracha sauce with the honey and soy mixture for a fiery edge. The heat balances the sweetness, creating a bold flavor profile that’s perfect for spice lovers. Serve with a cooling cucumber salad to tame the heat.
Coconut‑Lime Fusion
Replace half of the honey with coconut milk and add the zest of one lime. This variation brings a tropical creaminess and a fragrant citrus note, making the dish feel like a beachside dinner. Garnish with toasted coconut flakes for extra texture.
Maple‑Mustard Twist
Swap honey for pure maple syrup and add a teaspoon of Dijon mustard. The mustard introduces a subtle tang, while the maple adds a richer, earthier sweetness. This combo pairs beautifully with roasted root vegetables.
Asian Sesame Delight
Finish the dish with a drizzle of toasted sesame oil and a generous sprinkle of black sesame seeds. The nutty oil amplifies the umami, and the seeds add a pleasant crunch. Serve over jasmine rice for a truly Asian-inspired meal.
Herb‑Infused Garden Fresh
Mix chopped fresh rosemary and thyme into the sauce during the final simmer. The herbs infuse the glaze with an earthy aroma that complements the sweet‑savory base. This version is perfect for a spring dinner when herbs are at their peak.
BBQ‑Style Smoky Glaze
Add a tablespoon of smoked paprika and a splash of liquid smoke to the sauce for a deep, smoky flavor. This gives the dish a backyard‑grill vibe even when cooked indoors. Pair with corn on the cob for a true summer feast.
📦 Storage & Reheating Tips
Refrigerator Storage
Allow the chicken to cool to room temperature before transferring it to an airtight container. Store in the fridge for up to 3 days. When reheating, add a splash of water or broth to revive the glaze and prevent drying.
Freezing Instructions
Portion the cooked thighs into freezer‑safe bags, ensuring the glaze is well‑coated. Freeze for up to 2 months. To reheat, thaw overnight in the fridge, then warm in a skillet over medium heat, adding a little extra honey if needed.
Reheating Methods
The trick to reheating without drying it out? A splash of chicken broth or a drizzle of honey, covered with foil, and warmed gently in a 300°F (150°C) oven for 15‑20 minutes. Alternatively, microwave on 50% power in 30‑second bursts, stirring the sauce in between.