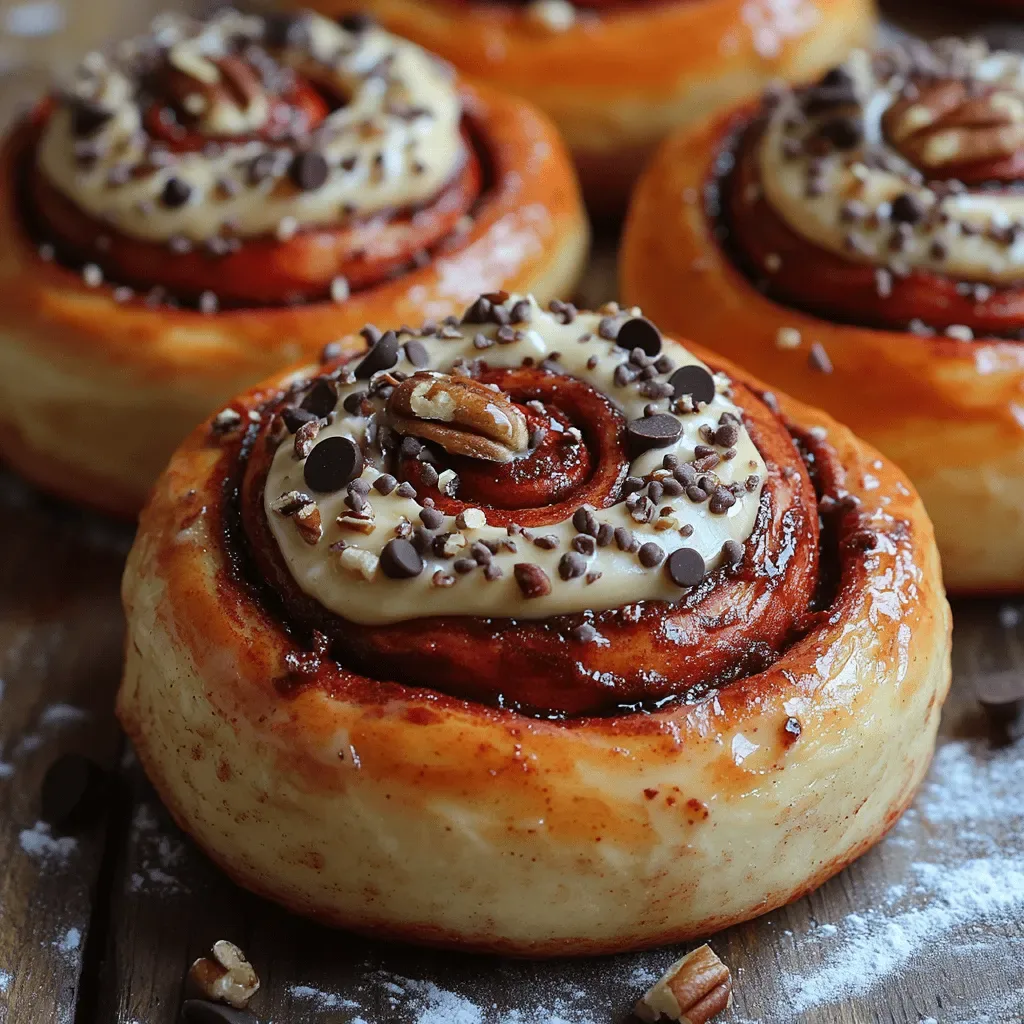
Imagine biting into a soft, pillowy roll that boasts the luxurious hue of a classic red‑velvet cake, swirled with warm cinnamon and finished with a tangy cream‑cheese glaze. That’s exactly what our Heavenly Red Velvet Cinnamon Rolls deliver—a breakfast indulgence that feels both elegant and comforting.
What sets this recipe apart is the secret blend of cocoa powder, beet‑juice powder, and a splash of vanilla that gives the dough its signature deep red color without any artificial dyes, while the buttery cinnamon‑sugar filling adds a familiar, cozy sweetness.
These rolls are perfect for lazy weekend brunches, special holiday mornings, or anytime you want to treat yourself and your loved ones to something truly unforgettable.
The process is straightforward: mix a tender yeast‑leavened dough, let it rise, roll it out, spread the spiced filling, shape the rolls, bake until golden, and finish with a silky cream‑cheese frosting that melts into every crevice.
Why You'll Love This Recipe
Vibrant Red Velvet Hue: The natural beet‑juice powder creates a stunning, bakery‑level color that makes every plate look picture‑perfect, turning an ordinary brunch into a celebration.
Moist, Tender Crumb: A combination of butter, milk, and a short rise time yields a soft, airy interior that stays moist even after cooling, perfect for make‑ahead breakfasts.
Layered Flavor Profile: The sweet cinnamon swirl meets the slight bitterness of cocoa, while the tangy cream‑cheese glaze balances the richness, creating a harmonious bite every time.
Simple, No‑Fuss Technique: Even novice bakers can master the dough handling and rolling steps with clear visual cues, making this a reliable crowd‑pleaser for any skill level.
Ingredients
The magic behind these cinnamon rolls lies in a few key components: a buttery, slightly sweet yeast dough that’s tinted red, a fragrant cinnamon‑brown sugar filling, and a luxuriously smooth cream‑cheese frosting. Each ingredient plays a specific role—flour provides structure, butter adds richness, and the beet‑juice powder delivers color without compromising flavor. The glaze, made with powdered sugar and tangy cream cheese, ties everything together with a silky finish.
Dough
- 3 ¼ cups (410 g) all‑purpose flour
- 2 ½ teaspoons active dry yeast
- ¼ cup (50 g) granulated sugar
- ¼ cup (60 ml) whole milk, warmed to 110°F
- ¼ cup (60 ml) warm water (110°F)
- ¼ cup (57 g) unsalted butter, melted
- 1 large egg, room temperature
- 2 tablespoons beet‑juice powder (or natural red food coloring)
- 1 teaspoon vanilla extract
Cinnamon Filling
- ½ cup (115 g) unsalted butter, softened
- ¾ cup (150 g) brown sugar, packed
- 2 tablespoons ground cinnamon
- ¼ teaspoon salt
Cream Cheese Frosting
- 4 ounces (115 g) cream cheese, softened
- ¼ cup (57 g) unsalted butter, softened
- 1 ½ cups (180 g) powdered sugar, sifted
- ½ teaspoon vanilla extract
- Pinch of salt
Together, these ingredients create a harmonious balance of texture and taste. The dough’s slight sweetness is amplified by the brown‑sugar‑cinnamon swirl, while the cream‑cheese frosting adds a tangy counterpoint that cuts through the richness. The beet‑juice powder not only gives a vivid, festive color but also blends seamlessly with the cocoa’s subtle earthiness, ensuring each bite looks as good as it tastes.
Step-by-Step Instructions
Preparing the Dough
In a large mixing bowl combine warm milk, warm water, sugar, and the yeast. Let it sit for 5‑7 minutes until foamy, indicating the yeast is active. Add the egg, melted butter, vanilla, and beet‑juice powder, whisking to blend. Gradually fold in the flour until a soft, slightly sticky dough forms.
First Rise
- Knead. Turn the dough onto a lightly floured surface and knead for 8‑10 minutes until smooth and elastic. Proper gluten development gives the rolls their classic lift.
- Proof. Place the dough in a lightly greased bowl, cover with a damp towel, and let rise in a warm spot (≈85°F) for 1‑1½ hours, or until doubled in size. You’ll know it’s ready when the dough springs back gently to the touch.
Making the Cinnamon Filling
While the dough rises, beat together the softened butter, brown sugar, cinnamon, and salt until light and fluffy. This spread will melt into the dough during baking, creating those signature caramelized swirls.
Rolling, Shaping, and Second Rise
- Roll Out. Punch down the risen dough and roll it into a rectangle about 12 × 16 inches. The surface should be smooth, not torn.
- Spread Filling. Evenly coat the dough with the cinnamon butter, leaving a ½‑inch border around the edges.
- Form Rolls. Starting from the long side, roll the dough tightly into a log. Pinch the seam to seal.
- Slice. Using a sharp serrated knife, cut the log into 12 equal pieces (about 1 ½‑inch thick). Place each roll in a greased 9‑inch round baking pan, spacing them slightly apart.
- Second Rise. Cover the pan loosely with foil and let the rolls rise for 30‑40 minutes, until they puff up and nearly touch each other.
Baking and Glazing
- Bake. Preheat the oven to 375°F (190°C). Bake the rolls for 20‑25 minutes, until the tops are a deep ruby‑red and a toothpick inserted into the center comes out clean.
- Make Frosting. While the rolls bake, beat the cream cheese and butter until creamy. Gradually add the powdered sugar, vanilla, and a pinch of salt until smooth.
- Glaze. As soon as the rolls exit the oven, drizzle the frosting over each warm roll. The heat melts the frosting, allowing it to seep into every crevice for a glossy finish.
Tips & Tricks
Perfecting the Recipe
Temperature Control. Keep all liquids between 105‑115°F; too hot kills the yeast, too cool slows the rise.
Don’t Over‑Knead. Stop kneading once the dough feels smooth and springs back—over‑kneading can make the rolls dense.
Even Rolling. Use a ruler or a piece of parchment to gauge thickness; a uniform ¼‑inch thickness ensures consistent baking.
Seal the Edge. Pinch the seam of each roll tightly; this prevents the filling from leaking during the second rise.
Flavor Enhancements
Add a teaspoon of espresso powder to the dough for a subtle depth that accentuates the cocoa. For a citrus twist, fold in a tablespoon of orange zest into the cream‑cheese frosting. A drizzle of melted dark chocolate over the finished rolls adds an extra layer of decadence.
Common Mistakes to Avoid
Skipping the second rise leads to dense, flat rolls. Also, avoid opening the oven door during the first 15 minutes of baking; the sudden temperature drop can cause the rolls to collapse. Finally, don’t frost the rolls while they’re still steaming hot—wait a couple of minutes to prevent a watery glaze.
Pro Tips
Use a Kitchen Scale. Measuring flour by weight (410 g) yields consistent dough texture every time.
Chill the Dough. After the first rise, refrigerate the dough for 30 minutes before rolling; this makes it easier to handle and reduces shrinkage.
Butter the Pan. Lightly butter the baking dish before placing the rolls; this adds a golden crust to the underside.
Finish with a Sprinkle. A pinch of flaky sea salt on the frosting just before serving balances the sweetness and enhances flavor.
Variations
Ingredient Swaps
Replace the beet‑juice powder with natural red food coloring if you prefer a more vivid hue. Swap butter for coconut oil for a dairy‑free version, and use almond flour mixed with a bit of tapioca starch to keep the texture light. For a nutty crunch, fold toasted pecans into the cinnamon filling.
Dietary Adjustments
To make the rolls gluten‑free, use a blend of rice flour, potato starch, and xanthan gum in place of all‑purpose flour. For a vegan twist, substitute the egg with a “flax egg” (1 tbsp ground flax + 3 tbsp water) and use plant‑based butter and cream cheese alternatives. A low‑sugar version can cut the granulated sugar in the dough by half and replace the brown sugar with a sugar‑free substitute.
Serving Suggestions
Serve these rolls alongside a bright citrus salad to cut through the richness, or pair them with a hot cup of chai latte for a cozy brunch vibe. For an indulgent brunch spread, add a side of smoked salmon and avocado toast, letting the sweet rolls balance the savory elements.
Storage Info
Leftover Storage
Allow the rolls to cool completely, then arrange them in an airtight container or a zip‑top bag. Store in the refrigerator for up to four days; the frosting will stay soft, and the rolls retain their moisture. For longer keeping, wrap each roll in parchment paper, place in a freezer‑safe bag, and freeze for up to three months.
Reheating Instructions
Reheat refrigerated rolls in a preheated 350°F oven for 8‑10 minutes, covered loosely with foil to prevent drying. For frozen rolls, bake at 375°F for 15‑18 minutes, again covering with foil for the first half. A quick microwave (10‑15 seconds) works for a single roll, but the oven method preserves the tender crumb and glossy glaze.
Frequently Asked Questions
These Heavenly Red Velvet Cinnamon Rolls blend striking color, melt‑in‑your‑mouth texture, and a perfect balance of sweet and tangy flavors—all without demanding advanced pastry skills. By following the detailed steps, using the tips, and exploring the suggested variations, you’ll create a show‑stopping brunch centerpiece that can be customized to suit any dietary need. Feel free to experiment with add‑ins or alternate glazes, and enjoy the delight of sharing these gorgeous rolls with family and friends.