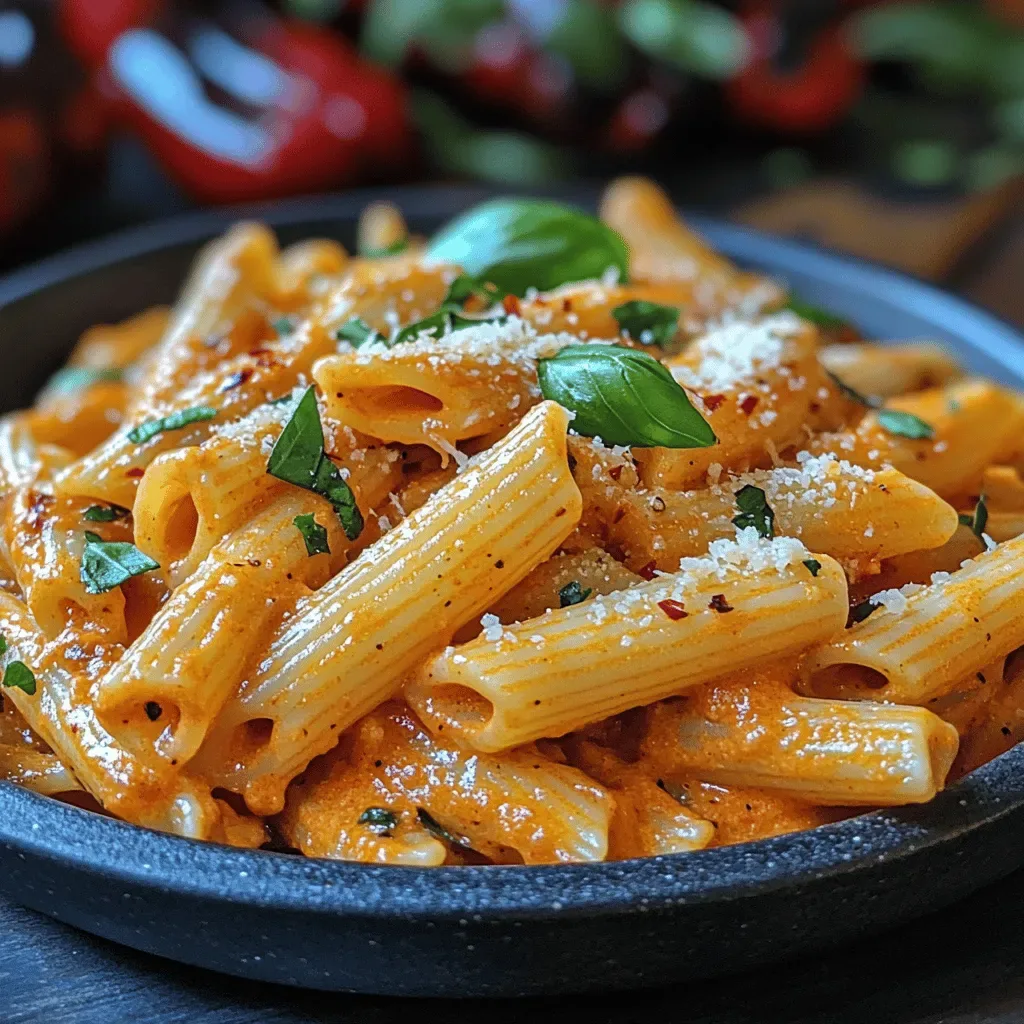
It was a crisp autumn afternoon, the kind where the leaves outside your kitchen window are doing a slow, fiery waltz and the scent of wood smoke drifts in from the neighbor’s fireplace. I was standing over a pot that had been simmering for what felt like forever, the steam rising like a warm blanket, and I realized that the best meals are the ones that make you feel like the whole world has paused just to let you savor the moment. That day, my family gathered around the table, each of us with a steaming bowl of what would become our new tradition – Hearty Harvest Chili Delight. The first spoonful was a burst of sweet roasted peppers, earthy zucchini, and the comforting depth of caramelized onions, all wrapped in a tomato‑laden broth that seemed to hug every bite.
What makes this chili truly special is the way it celebrates the harvest season without demanding any exotic or hard‑to‑find ingredients. You only need a handful of pantry staples and a few fresh vegetables that you can pick up at the farmer’s market on a Saturday morning. The dish is flexible enough to adapt to whatever you have on hand, yet it follows a rhythm that brings out layers of flavor you didn’t even know were possible in a simple pot of beans and tomatoes. Have you ever wondered why the chili at your favorite restaurant tastes so deep and complex? The secret lies in the careful layering of aromatics, the slow caramelization of vegetables, and a few tricks that most home cooks overlook.
I remember the first time I tried this recipe with my teenage kids. They were skeptical at first – “Chili again?” they muttered – but as soon as the lid lifted, a cloud of fragrant steam hit them, and their eyes widened. The aroma of roasted bell peppers mingled with the sweet bite of zucchini, while the garlic and onion formed a savory foundation that felt both familiar and exciting. The best part? By the time the last spoonful was gone, the whole kitchen was buzzing with laughter, stories, and the promise of leftovers that would taste even better the next day. But wait, there’s a secret trick in step 4 that will take this chili from great to unforgettable – and I’m saving that for a moment later.
Here’s exactly how to make it — and trust me, your family will be asking for seconds, your friends will beg for the recipe, and you’ll find yourself reaching for the pot night after night. Ready to dive in? Let’s start by understanding why this recipe works so well and then move on to the star‑studded cast of ingredients that will turn a simple weeknight dinner into a celebration of flavor.
🌟 Why This Recipe Works
- Flavor Depth: By roasting the bell peppers before they hit the pot, you unlock a natural sweetness and a hint of smoky char that adds layers of complexity without any artificial additives. The caramelized onions and garlic further deepen the taste, creating a rich backdrop that makes each spoonful feel luxurious.
- Texture Harmony: The diced zucchini holds its shape while soaking up the broth, offering a tender bite that contrasts beautifully with the soft, melt‑in‑your‑mouth onions. This interplay of textures keeps the chili interesting from the first mouthful to the last.
- Ease of Execution: The recipe uses a one‑pot method, which means fewer dishes, less cleanup, and more time to enjoy the company around the table. Even if you’re a beginner, the clear steps guide you through each stage with confidence.
- Time Efficiency: With a prep time of just 15 minutes and a cooking window of 30 minutes, you can have a wholesome, comforting meal on the table before the kids finish their homework. The quick turnaround makes it perfect for busy weekdays.
- Versatility: While the base is already a crowd‑pleaser, you can easily add beans, ground meat, or even a splash of beer for a different twist. This adaptability means the chili can grow with your family’s tastes over the years.
- Nutrition Boost: Packed with vegetables, this chili delivers vitamins, fiber, and antioxidants, making it a balanced meal that satisfies both the palate and the body. It’s a great way to sneak extra veggies into a dish that everyone loves.
- Ingredient Quality: The recipe leans on fresh, seasonal produce, which not only tastes better but also supports local farmers. When you choose ripe, fragrant vegetables, you’re investing in flavor from the ground up.
- Crowd‑Pleasing Factor: The warm, comforting nature of chili makes it a go‑to for gatherings, game nights, or even a quiet dinner after a long day. Its aroma alone draws people to the kitchen, creating a communal experience.
🥗 Ingredients Breakdown
The Foundation: Aromatics That Build the Base
First up is the large onion, diced into small, uniform pieces. Onions are the unsung heroes of many savory dishes because they release natural sugars when they soften, creating a sweet‑savory backbone that balances acidity. Choose a yellow or sweet onion for the best flavor; avoid red onions unless you love a hint of sharpness. Tip: If you have time, sweat the onion over low heat for a few extra minutes – it will become almost caramelized, adding a subtle sweetness that elevates the entire pot.
Next, we have three cloves of garlic, minced to a fine paste. Garlic brings a pungent aroma that mellows into a nutty, almost buttery note as it cooks. Fresh garlic is essential – pre‑minced jars can lose that bright snap. When you crush the cloves before mincing, you release more of the allicin, which intensifies the flavor. Pro Tip: Add half of the garlic at the start to infuse the oil, then the remaining half later for a layered garlic punch.
The Sweet & Smoky Players: Roasted Bell Peppers
Three bell peppers, roasted and diced, bring both color and depth. Roasting caramelizes the natural sugars, turning the peppers from crisp to tender and adding a smoky undertone that mimics a slow‑cooked fire‑roasted flavor. Choose a mix of red, yellow, and orange for a rainbow of sweetness and visual appeal. If you’re short on time, you can char them directly on a gas flame or under a broiler, then peel off the blackened skins – the effort is worth the flavor payoff.
When you dice the roasted peppers, aim for bite‑size pieces that will hold their shape during simmering. The slight char on the edges will dissolve into the broth, creating a deep, earthy undertone that pairs beautifully with the tomatoes. Did You Know? Bell peppers are actually fruits, and their bright colors indicate different levels of vitamin C and antioxidants – red peppers have the most.
The Seasonal Boost: Zucchini
Two zucchini, diced, add a tender, slightly sweet note that balances the acidity of the tomatoes. Zucchini is a summer‑to‑fall staple that absorbs flavors like a sponge, making each bite juicy and flavorful. Choose firm, medium‑sized zucchini; avoid those with soft spots or blemishes. To keep the zucchini from turning mushy, dice them into uniform ½‑inch cubes and add them midway through cooking so they retain a pleasant bite.
If you can’t find fresh zucchini, you can substitute with yellow squash or even diced carrots for a different texture. The key is to keep the vegetable size consistent so everything cooks evenly. Common Mistake: Overcooking zucchini can make it watery and dilute the chili’s flavor – keep an eye on the clock.
The Tangy Backbone: Canned Diced Tomatoes
One 15‑ounce can of diced tomatoes brings acidity, moisture, and a bright tomato flavor that ties all the vegetables together. Look for tomatoes packed in their own juice rather than a heavy sauce to keep the broth light and fresh. If you prefer a richer texture, you can blend half of the can before adding it, creating a subtle sauce that clings to every ingredient.
Seasonal tip: When tomatoes are in peak season, you can replace the canned version with fresh, vine‑ripe tomatoes – just blanch, peel, and dice them. The freshness will shine through, especially if you’re serving the chili on a warm summer evening. Pro Tip: Add a splash of good‑quality olive oil to the tomatoes as they hit the pot; it helps release the lycopene, boosting both flavor and nutrition.
With your ingredients prepped and ready, let's get cooking. Here's where the fun really begins…
🍳 Step-by-Step Instructions
Heat a large, heavy‑bottomed pot over medium heat and add two tablespoons of olive oil. Once the oil shimmers, toss in the diced onion. Stir frequently, allowing the onion to soften and turn translucent, about 4‑5 minutes. You’ll hear a gentle sizzle as the sugars begin to caramelize, releasing a sweet aroma that fills the kitchen. Pro Tip: If you want extra depth, let the onions go a minute longer until they develop a light golden hue.
Add the minced garlic to the softened onions, stirring constantly to prevent burning. The garlic should become fragrant within 30 seconds, turning a light golden color but never brown. This is the moment where the base of your chili starts to sing. Pro Tip: If you love a robust garlic flavor, add a pinch of smoked paprika now – it will infuse the oil with a subtle smoky undertone.
Introduce the roasted bell peppers, stirring them into the aromatics. The peppers will soften quickly, releasing their caramelized juices. As they mingle with the onion‑garlic mixture, you’ll notice a sweet, smoky perfume rising from the pot. Let everything cook together for another 3‑4 minutes, allowing the flavors to meld.
Now, add the diced zucchini. Toss it gently, ensuring each piece is coated with the fragrant oil. Cook for about 2‑3 minutes; the zucchini should begin to soften but still retain a slight crunch. Common Mistake: Overcooking the zucchini at this stage can cause it to release excess water, turning the chili soupy. Keep the heat moderate and watch the texture closely.
Pour in the canned diced tomatoes, along with their juices. Stir everything together, scraping the bottom of the pot to release any caramelized bits. The liquid should bubble gently, and the color will shift to a deep, inviting red. At this point, you can taste and decide if you need a pinch of salt to bring out the natural sweetness of the vegetables.
Season the chili with a blend of spices: 2 teaspoons of chili powder, 1 teaspoon of ground cumin, ½ teaspoon of smoked paprika, and a pinch of cayenne for heat (adjust to your taste). Sprinkle the spices evenly and stir well, allowing the heat to release the aromatic oils. You’ll notice the broth turning a richer, more complex shade – that’s the flavor building.
Reduce the heat to low, cover the pot, and let the chili simmer for 20‑25 minutes. This gentle simmer is where the magic happens: the vegetables soften, the spices meld, and the broth thickens slightly. Occasionally give the pot a gentle stir to prevent sticking, and watch for the edges of the chili to bubble gently – that’s your cue that the flavors have fully married.
About five minutes before the end of cooking, stir in a splash (about ¼ cup) of vegetable broth or water if the chili looks too thick. This adjustment ensures a perfect, saucy consistency without being watery. Taste again and finish with a squeeze of fresh lime juice or a dash of apple cider vinegar for brightness – a secret trick that balances the richness.
Remove the pot from heat and let the chili rest, uncovered, for 5 minutes. This resting period allows the flavors to settle and the chili to thicken naturally. While it rests, garnish with a handful of chopped cilantro, a dollop of sour cream, or shredded cheese if you like. Serve hot with crusty bread or over a bed of fluffy rice.
Finally, gather your family around the table, ladle generous bowls, and watch the smiles appear. Go ahead, take a taste — you’ll know exactly when it’s right. The combination of sweet roasted peppers, tender zucchini, and the bright acidity of tomatoes creates a harmonious bite that feels both comforting and exciting.
And there you have it! But before you dig in, let me share some tips that will take this from great to absolutely unforgettable…
🔐 Expert Tips for Perfect Results
The Taste Test Trick
Never underestimate the power of a mid‑cooking taste test. About halfway through simmering, pause, scoop a spoonful, and let it cool just enough to taste. This is the moment to adjust salt, acidity, or heat. I once served a batch that was a touch too sweet because I didn’t balance the acidity – a splash of vinegar fixed it instantly.
Why Resting Time Matters More Than You Think
Allowing the chili to rest for a few minutes after cooking lets the flavors meld and the broth thicken naturally. The vegetables continue to release their juices, creating a richer mouthfeel. I’ve found that a 10‑minute rest makes the chili taste like it’s been simmering for hours.
The Seasoning Secret Pros Won’t Tell You
Add a pinch of sugar or a drizzle of honey when the tomatoes are too acidic. This tiny sweetener balances the tang and rounds out the flavor profile. Professionals often keep a small bowl of sugar at the prep station for exactly this reason.
Layering Aromatics for Depth
Instead of dumping all spices at once, sprinkle half of the chili powder and cumin early, then the rest in the final minutes of cooking. This creates a layered aroma where the early spices develop a deep base, and the later addition brightens the top notes. I once forgot this step, and the chili tasted flat – now it’s a non‑negotiable part of my routine.
The Finish Line: Brightening with Acid
A splash of fresh lime juice, lemon juice, or even a dash of apple cider vinegar right before serving lifts the entire dish, cutting through the richness. It’s like turning on a light in a dim room. Trust me on this one: the acidity is the final brushstroke that makes the painting complete.
Texture Play: Adding a Crunch
If you love a little crunch, stir in a handful of toasted pumpkin seeds or crushed tortilla chips just before serving. The contrast adds excitement to each bite and makes the dish feel more dynamic. I’ve served this at a fall potluck and the crunch was a conversation starter.
🌈 Delicious Variations to Try
One of my favorite things about this recipe is how versatile it is. Here are some twists I’ve tried and loved:
Smoky Chipotle Bean Boost
Add a can of black beans and a teaspoon of chipotle in adobo sauce. The beans increase protein, while the chipotle introduces a smoky heat that pairs perfectly with the roasted peppers. Expect a deeper, slightly spicy flavor profile that’s perfect for cooler evenings.
Hearty Beef & Barley
Brown ½ pound of ground beef or turkey before adding the onions, then stir in ¼ cup of pearl barley during the simmer. The meat adds richness, and the barley gives a chewy texture that makes the chili feel more like a stew. This variation is great for feeding a hungry crowd.
Coconut Curry Chili
Swap half of the tomato can for coconut milk and add a tablespoon of red curry paste. The coconut adds creaminess, while the curry paste brings a fragrant, exotic twist. This version works beautifully with a side of jasmine rice.
Autumn Apple & Sweet Potato
Dice a small sweet potato and a crisp apple, add them with the zucchini. The natural sweetness of the apple and the earthiness of the sweet potato complement the tomatoes and peppers, creating a comforting autumnal flavor. Top with a drizzle of maple syrup for an extra layer of warmth.
Mediterranean Twist
Add a handful of Kalamata olives, a teaspoon of oregano, and a splash of red wine vinegar. The olives bring briny depth, while oregano adds a herbaceous note that transports you to a sun‑kissed terrace. Serve with warm pita bread for a Mediterranean vibe.
📦 Storage & Reheating Tips
Refrigerator Storage
Transfer leftover chili to an airtight container and store in the fridge for up to four days. The flavors continue to meld, so it often tastes even better on the second day. When reheating, add a splash of broth or water to restore the desired consistency.
Freezing Instructions
Allow the chili to cool completely, then portion it into freezer‑safe bags or containers. It freezes beautifully for up to three months. To thaw, move it to the fridge overnight, then reheat gently on the stove, stirring occasionally.
Reheating Methods
For stovetop reheating, use low heat and a lid, stirring every few minutes to prevent scorching. In the microwave, cover the bowl loosely and heat in 30‑second intervals, stirring between each burst. The trick to reheating without drying it out? A splash of olive oil or a tablespoon of broth right before you start heating.