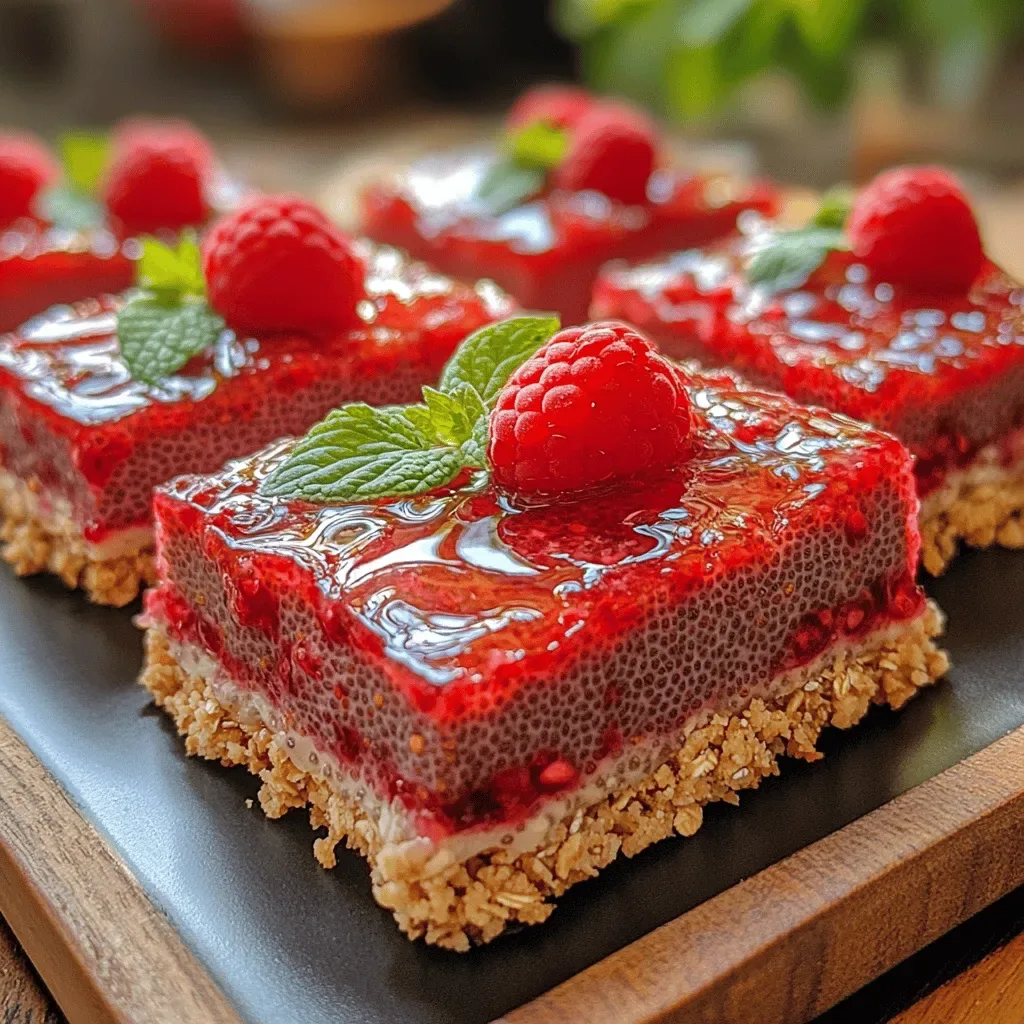
Picture a fluffy vanilla cake layered with silky vanilla ice cream, a drizzle of tangy raspberry glaze, and a sprinkle of toasted almond crumbs—all chilled to perfection. This is the Chill Out Ice Cream Sandwich Cake, a dessert that feels like a summer breeze in every bite.
What makes it special is the marriage of two classic comforts: cake and ice cream. The cake layers stay moist thanks to a hint of butter and milk, while the ice cream filling stays firm yet creamy when served straight from the freezer.
Ideal for brunch gatherings, birthday celebrations, or a lazy weekend treat, this cake will delight kids, teens, and adults alike. Its eye‑catching pink‑and‑white swirl also makes it a show‑stopper on any breakfast table.
The process is straightforward: bake two thin cake rounds, whip a light vanilla ice cream, assemble the sandwich, coat with a glossy raspberry glaze, and freeze until set. With just a few steps you’ll have a refreshing, crowd‑pleasing masterpiece.
Why You'll Love This Recipe
Cool & Creamy Contrast: The chilled ice‑cream core balances the warm‑baked cake, delivering a delightful temperature surprise that feels luxurious on a hot day.
Simple Assembly: With just two cake layers and a ready‑made vanilla ice cream, you can build the sandwich in under an hour, leaving plenty of time for entertaining.
Customizable Flavors: Swap the raspberry glaze for strawberry, blueberry, or even a chocolate ganache, letting you tailor the cake to any palate or theme.
Brunch‑Ready Elegance: Its striking appearance and refreshing taste make it perfect for late‑morning gatherings, adding a dessert‑like twist to traditional brunch menus.
Ingredients
For this cake I rely on a few high‑quality staples that work together to create texture and flavor. The buttery vanilla cake provides a tender base, while the premium vanilla ice cream supplies a rich, creamy core. Fresh berries give a bright acidity, and toasted almonds add a satisfying crunch. Finally, a light glaze ties everything together with a glossy finish.
Cake Layers
- 1 ½ cups all‑purpose flour
- ½ cup granulated sugar
- ¼ cup unsalted butter, softened
- ¼ cup whole milk
- 2 large eggs
- 1 ½ tsp baking powder
- 1 tsp vanilla extract
Ice‑Cream Filling
- 2 ½ cups premium vanilla ice cream (softened)
- 1 tbsp honey (optional, for extra sweetness)
Raspberry Glaze
- 1 cup fresh raspberries (or frozen, thawed)
- ¼ cup powdered sugar
- 1 tsp lemon juice
Finishing Touches
- ¼ cup sliced toasted almonds
- Fresh mint leaves (optional, for garnish)
The flour and baking powder create a light crumb that won’t overpower the ice‑cream core. Butter and milk keep the cake tender, while vanilla adds aromatic depth. The softened vanilla ice cream spreads easily between the layers, forming a smooth, frozen filling that holds its shape once the cake is frozen. Raspberries provide a natural tartness that cuts through the richness, and powdered sugar gives the glaze a glossy sheen. Finally, toasted almonds contribute texture and a nutty finish that elevates the overall experience.
Step-by-Step Instructions
Preparing the Cake Layers
Preheat your oven to 350°F (175°C). In a large bowl whisk together flour, baking powder, and a pinch of salt. In a separate bowl, cream butter and sugar until pale and fluffy, then beat in the eggs one at a time followed by vanilla. Alternate adding the dry mixture and milk, beginning and ending with the dry ingredients. Pour the batter into a greased 9‑inch round pan, spreading evenly. Bake for 12‑15 minutes, or until a toothpick inserted in the center emerges clean. Let cool completely on a wire rack before slicing horizontally into two equal rounds.
Whipping the Ice‑Cream Filling
While the cake cools, place the softened vanilla ice cream in a large mixing bowl. Using a rubber spatula, fold in honey (if using) until the mixture is smooth and slightly softer than spreadable frosting. Transfer the mixture to a shallow dish, cover with plastic wrap, and refrigerate for 10 minutes to firm up just enough for spreading.
Assembling the Sandwich
- Layer the Base. Place the first cake round on a parchment‑lined sheet pan. Spread the softened ice‑cream filling evenly, reaching the edges. The filling should be about ¼‑inch thick; a thin layer ensures the cake stays stable when frozen.
- Top the Cake. Gently place the second cake round on top of the ice‑cream layer, pressing down lightly to adhere. If any ice‑cream oozes out, smooth it with a spatula.
- Freeze. Cover the assembled cake loosely with foil and place it in the freezer for at least 2 hours, or until the ice‑cream core is firm. This step is crucial for clean slicing.
Preparing the Raspberry Glaze
In a small saucepan combine raspberries, powdered sugar, and lemon juice. Cook over medium heat, stirring frequently, until the berries break down and the mixture thickens (about 5‑7 minutes). Strain through a fine‑mesh sieve to remove seeds, then let the glaze cool to room temperature. It should be glossy yet pourable.
Finishing the Cake
- Glaze the Top. Remove the frozen cake from the freezer. Place it on a serving platter and pour the raspberry glaze over the top, allowing it to cascade down the sides. The glaze will set slightly as the cake returns to the freezer.
- Add Crunch. Sprinkle toasted almond slices evenly over the glaze while it’s still wet. This adds texture and a nutty flavor contrast.
- Final Chill. Return the cake to the freezer for an additional 30 minutes to let the glaze firm.
- Serve. Using a hot, dry knife, slice the cake into 12 equal wedges. Garnish with a few mint leaves if desired and serve immediately for the ultimate refreshing bite.
Tips & Tricks
Perfecting the Recipe
Cool Cake Completely. Allow the cake layers to reach room temperature before assembling; any residual heat will melt the ice‑cream and cause soggy edges.
Use Softened Ice Cream. Soften the ice cream just enough to spread—over‑softening makes it runny, while under‑softening makes it hard to level.
Freeze the Assembled Cake. A solid core is essential for clean slices; at least 2 hours of freezing yields firm, sliceable results.
Warm Your Knife. Dip the knife in hot water, wipe dry, and slice; this prevents the ice cream from sticking and creates smooth cuts.
Flavor Enhancements
Add a teaspoon of orange zest to the glaze for a citrus twist, or swirl a spoonful of white chocolate ganache into the ice‑cream filling for extra richness. A pinch of sea salt over the almond topping amplifies the sweet‑salty balance.
Common Mistakes to Avoid
Skipping the final chill can leave the glaze runny, causing it to slide off the cake. Also, avoid using low‑fat ice cream; the reduced fat makes the filling crumbly and less creamy once frozen.
Pro Tips
Toast Almonds Evenly. Spread them on a baking sheet and toast at 350°F for 5‑7 minutes, stirring halfway, for a deep, golden flavor.
Use a Light‑Colored Pan. Dark pans can cause the cake edges to over‑brown, while a light‑colored pan promotes even baking.
Make Glaze Ahead. The raspberry glaze can be prepared a day in advance and stored refrigerated; simply bring to room temperature before pouring.
Variations
Ingredient Swaps
Replace vanilla ice cream with strawberry or mango sorbet for a fruitier core. Swap the raspberry glaze for a passion‑fruit coulis, blueberry compote, or a dark chocolate ganache. For a nut‑free version, use toasted pumpkin seeds instead of almonds.
Dietary Adjustments
Use gluten‑free flour blend to keep the cake safe for gluten‑intolerant guests. Choose a dairy‑free ice cream (coconut or almond‑based) and substitute butter with vegan margarine for a fully plant‑based dessert. Low‑sugar versions can be made by using a sugar‑free sweetener in the glaze.
Serving Suggestions
Pair each slice with a dollop of whipped coconut cream and fresh berries for extra elegance. A side of chilled citrus‑infused sparkling water balances the sweetness. For brunch, serve alongside a light fruit salad or a stack of flaky croissants.
Storage Info
Leftover Storage
Keep any leftovers in an airtight container lined with parchment paper to prevent freezer burn. Store in the freezer for up to 3 weeks. If you plan to eat within 2‑3 days, transfer a slice to the refrigerator, covered, and consume within 48 hours.
Reheating Instructions
For a softer bite, let a slice sit at room temperature for 5‑7 minutes before serving. If you prefer a warm contrast, microwave the slice on low power (30‑40 seconds) just until the glaze softens, being careful not to melt the ice‑cream core.
Frequently Asked Questions
This Chill Out Ice Cream Sandwich Cake brings together the comforting familiarity of cake with the cool indulgence of ice cream, all wrapped in a vibrant raspberry glaze. By following the step‑by‑step guide, using the tips provided, and experimenting with the suggested variations, you’ll create a memorable summer brunch centerpiece. Feel free to add your own twists—whether it’s a new fruit glaze or a different nut topping—and enjoy every refreshing slice with friends and family.