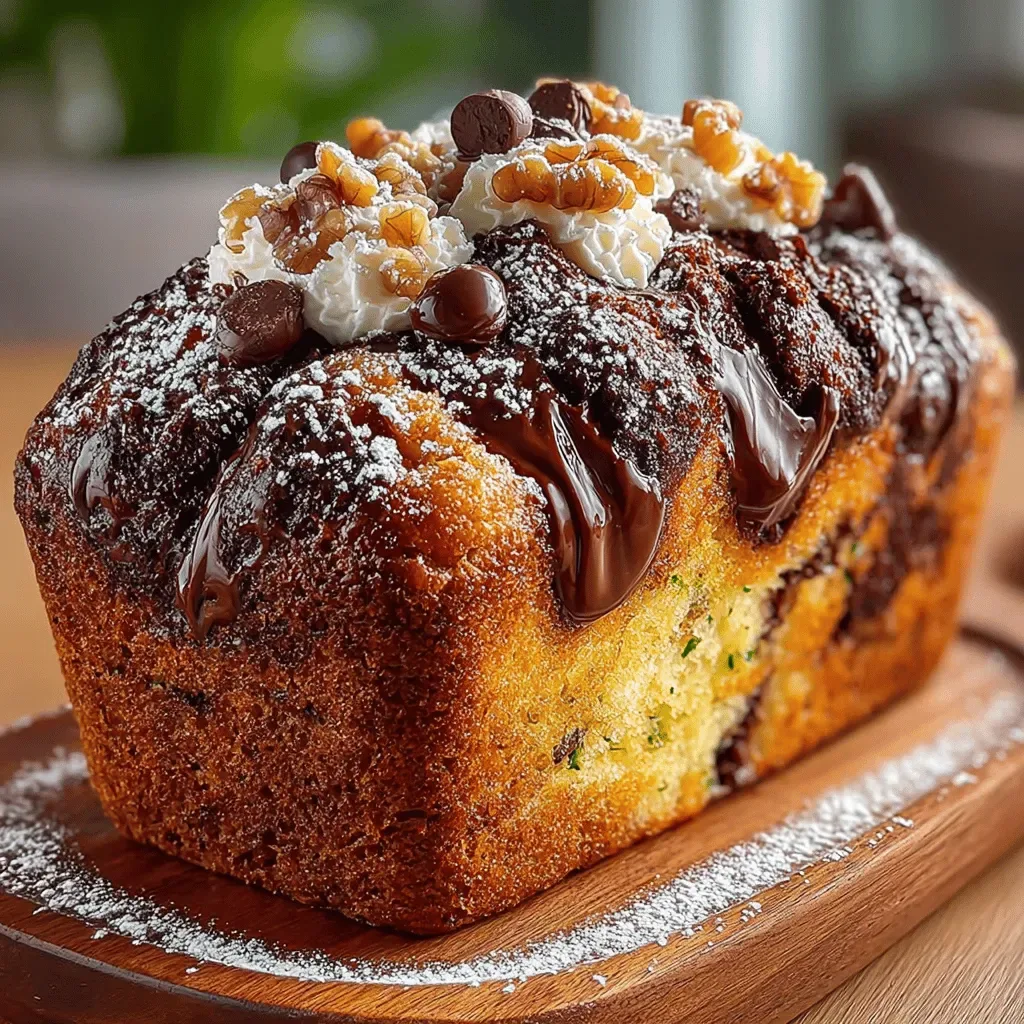
It was a crisp Saturday morning in early autumn, the kind where the sunlight drips through the kitchen window in golden ribbons and the scent of fresh coffee already hangs in the air. I was rummaging through the pantry, looking for something to turn a lazy weekend into a celebration, when I spotted a loaf of brioche that had been waiting patiently for its moment of glory. The moment I sliced through that buttery, slightly sweet bread, a whisper of vanilla and sugar rose up, promising something indulgent yet comforting. I remember the first time I tried a simple French toast with ordinary white bread—just a soggy, bland affair—but this time, with thick‑cut brioche soaking in a custard of eggs, milk, and a hint of cinnamon, I felt like I was about to create a masterpiece that would make even the most seasoned brunch‑goer swoon.
The magic truly begins when the batter kisses the bread, and you hear that satisfying sizzle as the butter melts in the pan. As the slices turn a deep, caramelized gold, a fragrant steam rises, carrying notes of vanilla, cinnamon, and a whisper of maple that makes your stomach do a happy dance. The first bite is a symphony: the crisp exterior gives way to a soft, custardy interior that’s just sweet enough to make you smile, while the maple cream topping adds a silky, buttery richness that feels like a hug from the inside out. Have you ever wondered why restaurant French toast feels so luxurious? The secret lies in the quality of the bread and the balance of the custard—details we’ll unpack together.
What makes this recipe a true breakfast delight is its simplicity paired with a touch of elegance. You don’t need a professional kitchen or a pantry full of exotic ingredients; just a few staples and a little love, and you’ll have a dish that looks and tastes like it belongs on a brunch menu. But wait—there’s a secret trick in step 4 that will elevate the texture to an almost melt‑in‑your‑mouth perfection, and I’ll reveal it shortly. Imagine serving this to your family on a lazy Sunday, watching their eyes light up as they drizzle the maple cream over each plate. The best part? This dish is versatile enough to become a holiday tradition or a quick weekday treat, depending on how you dress it up.
Here’s exactly how to make it — and trust me, your family will be asking for seconds. From selecting the perfect brioche to mastering the caramelized crust and whipping up a dreamy maple cream, we’ll walk through every step together. Along the way, I’ll share personal anecdotes, pro tips, and a few common pitfalls to avoid, so you can feel confident and excited about each bite. Ready to dive in? Let’s start with why this recipe works so wonderfully and then gather our ingredients with a little culinary storytelling.
🌟 Why This Recipe Works
- Flavor Depth: The combination of vanilla, cinnamon, and a touch of sugar creates a layered sweetness that’s both comforting and sophisticated, ensuring every bite feels like a celebration.
- Texture Contrast: Thick‑cut brioche provides a sturdy yet tender canvas that soaks up the custard without falling apart, while the butter‑seared exterior adds a crisp, caramelized crunch.
- Ease of Execution: With only a handful of pantry staples and a simple pan‑fry technique, even novice cooks can achieve restaurant‑quality results without stress.
- Time Efficiency: The prep takes just 15 minutes, and the cooking process is streamlined into a single pan, making it perfect for busy mornings or leisurely brunches.
- Versatility: This base can be customized with fruit, nuts, or flavored syrups, allowing you to adapt it to seasonal produce or personal preferences.
- Nutrition Balance: Using whole milk or cream adds healthy fats, while the eggs provide protein, creating a satisfying and energizing start to the day.
- Ingredient Quality: Brioche’s buttery richness elevates the dish, and using real maple syrup in the cream adds natural sweetness without artificial aftertaste.
- Crowd‑Pleasing Factor: The visual appeal of golden slices drizzled with glossy maple cream makes it an instant hit for guests of all ages.
🥗 Ingredients Breakdown
The Foundation
The star of this dish is 4 slices of brioche bread. Brioche’s rich, buttery crumb absorbs the custard beautifully while maintaining its shape, preventing the dreaded soggy mess. If you can’t find brioche, a good-quality challah or a slightly sweet milk bread can serve as a substitute, though the flavor won’t be quite as decadent. When shopping, look for bread with a soft, pillowy interior and a lightly golden crust—these characteristics signal a high butter content, which is essential for that melt‑in‑your‑mouth texture.
Aromatics & Spices
The custard mixture features 2 large eggs, 1/2 cup of whole milk (or heavy cream for extra richness), 1 teaspoon of vanilla extract, and 1/2 teaspoon of ground cinnamon. Eggs provide structure and a silky mouthfeel, while the milk (or cream) adds moisture and a subtle dairy richness. Vanilla extracts the sweet aroma, and cinnamon introduces a warm, comforting spice that pairs perfectly with maple. If you prefer a lighter version, substitute half the milk with almond milk, but keep in mind that the texture will be slightly less creamy.
The Secret Weapons
A pinch of 1 tablespoon of sugar (optional) can be added to the custard if you like a sweeter base, especially when using plain milk. This is the moment where you can adjust sweetness to your taste—remember, the maple cream will add additional sweetness later, so start modestly. Finally, butter (about 2 tablespoons) for cooking is crucial; it not only prevents sticking but also contributes a nutty, caramelized flavor as it browns. If you’re looking for a dairy‑free option, try clarified coconut oil, though the flavor profile will shift toward tropical notes.
Finishing Touches
The crowning glory is the maple cream, which we’ll whip up using real maple syrup, a splash of cream, and a pinch of salt. This silky sauce adds a glossy finish and a deep, caramel‑like sweetness that perfectly balances the buttery brioche. For an extra twist, a dash of orange zest can be added to the cream, giving a bright citrus note that cuts through the richness. Selecting a high‑grade, 100% pure maple syrup is essential; cheaper syrups often contain corn syrup and lack the complex flavor that makes this dish sing.
With your ingredients prepped and ready, let's get cooking. Here's where the fun really begins...
🍳 Step-by-Step Instructions
Start by whisking together the 2 large eggs, 1/2 cup whole milk (or cream), 1 teaspoon vanilla extract, 1/2 teaspoon ground cinnamon, and the optional 1 tablespoon sugar in a shallow bowl. Whisk until the mixture is smooth, pale, and slightly frothy; you’ll notice tiny bubbles forming, indicating that air has been incorporated, which will help the toast stay light. Let the custard rest for about 5 minutes—this short pause allows the flavors to meld, and the starches in the milk to hydrate, creating a richer coating for the bread.
While the custard rests, heat a large non‑stick skillet over medium‑low heat and add 1 tablespoon of butter. As the butter melts, listen for a gentle sizzle—if it starts to brown too quickly, lower the heat; you want the butter to melt slowly so it releases its nutty aroma without burning. Once the butter is fully melted and fragrant, carefully lay the 4 slices of brioche in the pan, allowing a little space between each slice.
Now, gently pour the prepared custard over the brioche slices, ensuring each piece is fully submerged. Let the bread sit in the mixture for about 30 seconds per side, allowing it to soak up the liquid without falling apart. You’ll see the edges of the bread start to soften and the custard turning a light amber color—this is the moment where the magic begins. Flip the slices once, giving them a quick turn to ensure even absorption.
After the bread has absorbed the custard, add the remaining 1 tablespoon of butter to the skillet, letting it melt and foam. Carefully lay each slice back into the pan, pressing gently with a spatula to ensure full contact with the butter. Cook on medium heat for 3–4 minutes per side, or until the underside is a deep golden‑brown and you can hear a faint crackle. When the edges start to bubble and the surface looks set, it’s time to flip.
While the second side cooks, whisk together 1/4 cup heavy cream, 2 tablespoons pure maple syrup, and a pinch of sea salt in a small bowl until soft peaks form. The cream should be slightly chilled; this helps it hold its shape and creates a light, airy topping that will melt gently over the hot toast. Taste the mixture and adjust the maple sweetness if needed—remember, the toast itself carries a subtle sweetness, so you don’t want to overpower it.
When both sides of the toast are beautifully browned, remove the slices from the pan and place them on a warm serving platter. The aroma at this stage is intoxicating—a blend of buttery caramel, vanilla, and cinnamon that fills the kitchen and makes everyone’s stomach rumble. Let the toast rest for a minute; this short pause allows the interior to set, ensuring each bite stays fluffy.
Finally, dollop generous spoonfuls of the maple cream over each slice, allowing it to cascade down the sides in glossy ribbons. For an extra visual pop, sprinkle a handful of toasted pecans or a dusting of powdered sugar. Serve immediately while the toast is still warm and the cream is slightly melting, creating a luscious sauce that pools on the plate. Go ahead, take a taste — you’ll know exactly when it’s right.
And there you have it! But before you dig in, let me share some tips that will take this from great to absolutely unforgettable...
🔐 Expert Tips for Perfect Results
The Taste Test Trick
Before you commit to the full batch, dip a single corner of a brioche slice into the custard and fry it quickly. This tiny test lets you gauge the sweetness and seasoning balance, so you can adjust the vanilla or cinnamon before the main cooking begins. I once under‑seasoned my custard, and this quick check saved the entire dish from being bland. Trust me on this one: a small tweak now prevents a big regret later.
Why Resting Time Matters More Than You Think
Allowing the custard to rest for a few minutes after whisking gives the flour (if you add a splash) and the egg proteins a chance to fully hydrate. This results in a smoother, more cohesive coating that adheres perfectly to the brioche. I used to skip this step and ended up with a thin, uneven crust that fell off during cooking. The result? A less satisfying texture. Now I always set a timer for five minutes, and the difference is night and day.
The Seasoning Secret Pros Won’t Tell You
A pinch of sea salt in the maple cream does more than just balance sweetness; it amplifies the buttery notes of the brioche and brings out the subtle vanilla aroma. Professional chefs often finish sweet dishes with a tiny dash of flaky salt for that “pop” sensation on the palate. I once served this to a pastry chef who said the salt made the dish feel “finished” rather than “unfinished.”
Choosing the Right Pan
A heavy‑bottomed skillet distributes heat evenly, preventing hot spots that can scorch the butter. Cast iron works wonderfully, but a good-quality stainless steel pan with an aluminum core is also excellent. The key is to preheat the pan slowly; if you rush, the butter will burn before the toast gets a chance to brown. I once used a thin non‑stick pan on high heat and ended up with uneven, dark spots that ruined the presentation.
The Butter Basting Method
During the final minute of cooking, tilt the pan slightly and use a spoon to baste the toast with melted butter. This technique adds an extra layer of gloss and infuses the surface with buttery flavor, giving the toast a restaurant‑quality shine. I discovered this trick while watching a cooking show, and it instantly upgraded my home‑cooked French toast to a show‑stopper.
Serving Warm, Not Hot
Allow the toast to rest for about 60 seconds after plating before adding the maple cream. This short cooling period prevents the cream from instantly melting into a runny puddle, letting it stay thick enough to be spooned elegantly. If you serve it too hot, the cream will dissolve too quickly, losing its airy texture. The result is a beautifully balanced bite where the cream gently coats each mouthful.
🌈 Delicious Variations to Try
One of my favorite things about this recipe is how versatile it is. Here are some twists I've tried and loved:
Berry‑Burst Bliss
Swap the maple cream for a mixed‑berry compote made with fresh strawberries, blueberries, and a splash of lemon juice. The tartness of the berries cuts through the richness, creating a bright, summer‑ready version that feels light yet indulgent.
Nutty Caramel Crunch
Add a handful of toasted pecans or walnuts to the maple cream, and drizzle a thin stream of caramel sauce over the top. The nuts introduce a satisfying crunch, while the caramel adds an extra layer of sweetness that pairs perfectly with the cinnamon.
Savory Herb Twist
For a brunch‑savory hybrid, omit the sugar and maple syrup, and instead fold in chopped fresh herbs like thyme and chives into the custard. Finish with a dollop of herb‑infused cream cheese and a sprinkle of grated Parmesan for a sophisticated, savory spin.
Tropical Coconut Dream
Replace the whole milk with coconut milk and swirl in a spoonful of toasted coconut flakes into the maple cream. The coconut adds a subtle tropical flavor that transports you to a beachside breakfast.
Chocolate Hazelnut Delight
Mix a tablespoon of hazelnut spread into the maple cream and sprinkle cocoa nibs on top. The nutty chocolate notes elevate the dish into a decadent treat perfect for special occasions.
📦 Storage & Reheating Tips
Refrigerator Storage
Allow any leftover French toast to cool completely, then store the slices in an airtight container in the fridge for up to 3 days. Keep the maple cream in a separate small jar to maintain its texture. When ready to eat, reheat the toast in a skillet with a dab of butter for 2 minutes per side to revive the crisp crust.
Freezing Instructions
For longer storage, wrap each cooled slice individually in parchment paper, then place them in a freezer‑safe bag. They’ll keep for up to 2 months. To reheat, bake the frozen slices at 350°F (175°C) for 10‑12 minutes, or until heated through, and then finish with a quick pan‑sear for that fresh‑out‑of‑the‑pan crunch.
Reheating Methods
The trick to reheating without drying it out? A splash of milk or a thin pat of butter in the pan, covered with a lid for the first minute, creates steam that gently revives the interior while the bottom regains its golden crispness. Avoid microwaving, as it tends to make the bread rubbery and the cream watery.