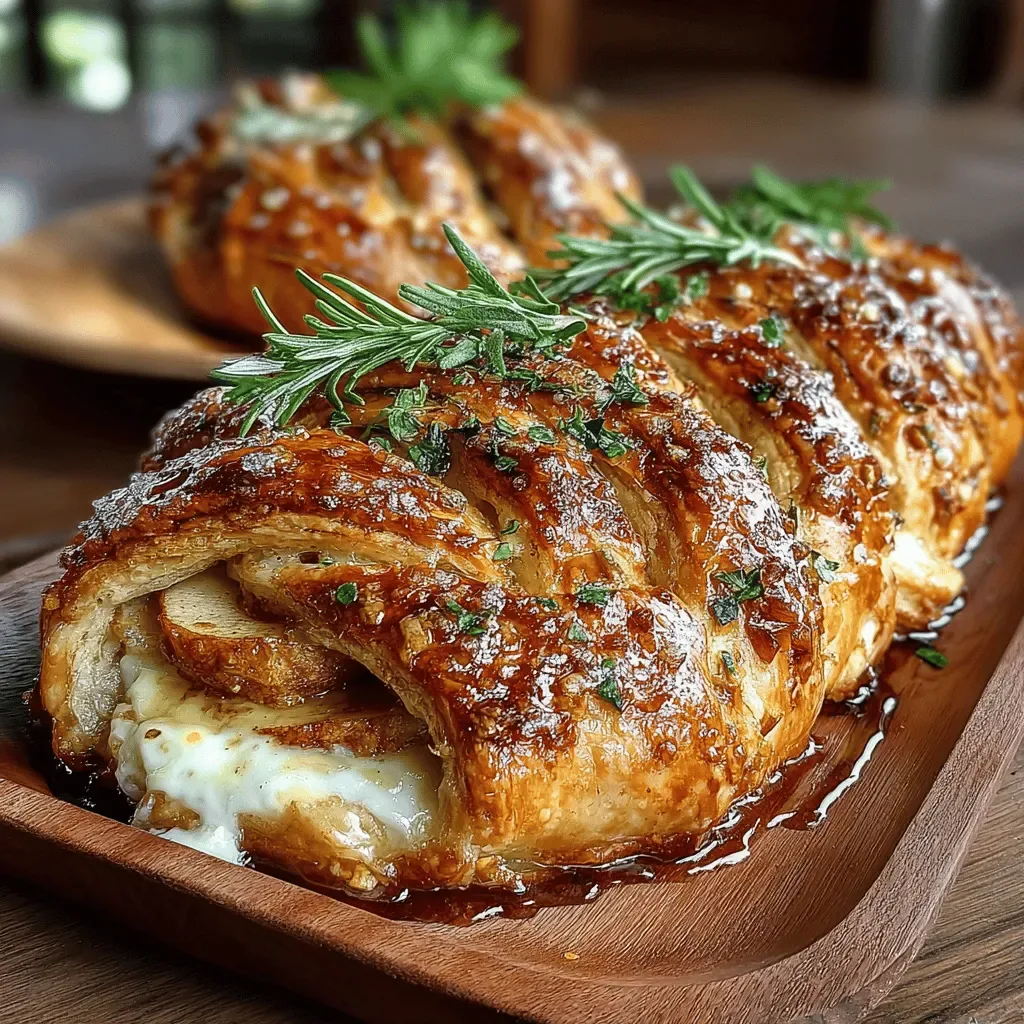
Imagine the buttery crunch of puff pastry intertwined with sweet‑tart apples and creamy brie, all braided into a stunning breakfast centerpiece. This is exactly what Apple Brie Puff Pastry Braids deliver—an elegant twist on the classic fruit‑filled pastry that feels both indulgent and approachable.
What makes this recipe truly special is the harmony of textures: flaky layers, gooey cheese, and caramelized fruit that melt together in every bite. A light dusting of cinnamon and a glossy egg wash give the braids a beautiful golden sheen that’s impossible to ignore.
Busy families, brunch hosts, and anyone who loves a touch of decadence will adore these braids. They shine at weekend brunches, holiday morning spreads, or whenever you crave a show‑stopping breakfast that’s still quick enough for a weekday.
The process is straightforward: roll out puff pastry, layer apples and brie, braid, brush with egg wash, and bake until puffed and golden. In just 45 minutes you’ll have a bakery‑quality masterpiece ready to share.
Why You'll Love This Recipe
Flavor Fusion: The sweet apples, tangy brie, and warm spices create a balanced bite that feels both comforting and sophisticated.
Eye‑Catching Presentation: Braided pastries look impressive on any brunch table, turning a simple meal into a celebratory experience.
Quick & Easy: With minimal prep and a single bake, you can achieve bakery‑level results without hours in the kitchen.
Customizable: Swap apples for pears, add nuts, or experiment with different cheeses to make the dish truly your own.
Ingredients
For these braids I rely on high‑quality puff pastry sheets that provide the flaky foundation, crisp apples for natural sweetness, and a soft‑but‑rich brie that melts into every fold. The butter, brown sugar, and warm spices turn the fruit into a caramel‑like filling, while the egg wash creates a glossy, golden finish. A handful of toasted walnuts adds crunch and visual appeal.
Puff Pastry & Butter
- 2 sheets frozen puff pastry, thawed
- 2 tablespoons unsalted butter, melted
Apple & Cheese
- 2 medium apples (such as Granny Smith), thinly sliced
- 4 ounces brie cheese, cut into thin strips
Sweet & Spice
- 3 tablespoons brown sugar
- 1 teaspoon ground cinnamon
- ¼ teaspoon ground nutmeg
- ¼ cup chopped toasted walnuts (optional)
Egg Wash & Garnish
- 1 large egg, lightly beaten
- 1 tablespoon milk (for egg wash)
- Coarse sea salt, for sprinkling
Each component plays a specific role: the puff pastry creates layers that puff up, the butter adds richness, and the melted brie supplies a luxurious creaminess that balances the tart apples. Brown sugar, cinnamon, and nutmeg turn the fruit into a fragrant compote, while walnuts contribute a satisfying crunch. The egg wash guarantees a glossy, golden exterior, and a pinch of sea salt finishes the braids with a subtle pop of flavor.
Step-by-Step Instructions
Preparing the Puff Pastry
Lay the thawed puff pastry sheets on a lightly floured surface. Gently roll each sheet into a 12‑inch rectangle, being careful not to press out the layers. Brush the surface with the melted butter; this adds flavor and helps the pastry achieve a deep golden color during baking.
Assembling the Braids
- Layer the Apples. Evenly distribute the thin apple slices across the buttered pastry, leaving a ½‑inch border on all sides. The apples will soften and caramelize, providing moisture and sweetness.
- Add the Brie. Place the brie strips on top of the apples, spacing them about 1 inch apart. As the pastry bakes, the brie will melt, creating a creamy ribbon that binds the fruit.
- Sprinkle Sweetness & Spice. Mix brown sugar, cinnamon, and nutmeg together, then dust the apple‑brie layer evenly. This step builds the caramelized flavor and aromatic warmth that define the dish.
- Form the Braids. Starting at one long edge, fold the pastry over the filling in a tight roll, then cut the roll into three equal strips. Braid the strips together, tucking the ends underneath to seal.
Baking
- Apply Egg Wash. In a small bowl, whisk the egg with milk. Brush the braid generously; the egg wash will give the pastry a glossy, deep‑gold finish once baked.
- Season the Top. Sprinkle a pinch of coarse sea salt over the braid. The salt accentuates the sweet caramel and balances the richness of the brie.
- Bake. Transfer the braid to a parchment‑lined baking sheet and bake in a preheated 400°F (200°C) oven for 20‑25 minutes, or until puffed, golden, and the cheese is bubbling. The high heat creates steam that lifts the layers for maximum flakiness.
Finishing Touches
Allow the braids to rest for 5 minutes before slicing. This short rest lets the cheese set slightly, preventing it from spilling out when you cut. Garnish with toasted walnuts and an extra drizzle of melted butter if desired. Serve warm, straight from the oven, for the ultimate brunch wow factor.
Tips & Tricks
Perfecting the Recipe
Uniform Apple Slices. Use a mandoline to slice apples evenly; uniform pieces cook at the same rate and create a consistent caramel texture.
Chill the Braid. After assembling, refrigerate the braid for 10 minutes before baking. The cold butter solidifies, leading to a higher rise and flakier layers.
Don’t Over‑fill. Keep the filling to a thin, even layer; too much moisture can make the pastry soggy instead of crisp.
Flavor Enhancements
Add a drizzle of honey or a splash of Calvados over the braid just before baking for an extra depth of sweetness. A pinch of freshly grated orange zest brightens the spice profile, while a few toasted almond slivers give an additional crunch.
Common Mistakes to Avoid
Avoid using overly ripe apples—they release excess juice that can sog the pastry. Also, never skip the egg wash; without it the braid will look pale and lack that coveted glossy finish.
Pro Tips
Use Cold Butter. Keep butter chilled until the moment you brush it on; cold fat creates steam that lifts the pastry layers.
Pre‑heat the Baking Sheet. A hot sheet gives the bottom of the braid an immediate burst of heat, ensuring even puffing.
Check Color, Not Time. Ovens vary; watch for a deep golden brown rather than strictly relying on minutes.
Variations
Ingredient Swaps
Swap Granny Smith apples for crisp pears or tart quince for a different fruit note. Replace brie with a mild goat cheese for a tangier bite, or use a slice of caramelized onion for a savory twist. Even a handful of dried cranberries can add a chewy texture.
Dietary Adjustments
For a gluten‑free version, use certified gluten‑free puff pastry. Swap butter for a plant‑based alternative and use a vegan cheese such as cashew‑based brie to keep it dairy‑free. A low‑sugar adaptation can replace brown sugar with a natural sweetener like stevia or erythritol.
Serving Suggestions
Pair the braids with a bright citrus salad, a dollop of Greek yogurt, or a simple maple‑glazed bacon strip. A glass of sparkling apple cider or a light rosé complements the sweet‑savory balance, making the dish perfect for a relaxed weekend brunch.
Storage Info
Leftover Storage
Allow the braids to cool completely, then wrap them tightly in plastic wrap and place in an airtight container. Refrigerate for up to 3 days. For longer keeping, freeze the cooled braids in a freezer‑safe bag; they retain quality for up to 2 months.
Reheating Instructions
Reheat frozen or refrigerated braids in a 350°F (175°C) oven for 10‑12 minutes, covered with foil to prevent over‑browning. Remove the foil for the final 2 minutes to restore crispness. A quick microwave burst (30‑seconds) works in a pinch, but the oven method preserves the flaky texture best.
Frequently Asked Questions
Apple Brie Puff Pastry Braids bring together sweet fruit, creamy cheese, and buttery layers into a single, show‑stopping brunch centerpiece. With clear steps, helpful tips, and plenty of room for personalization, this recipe is both reliable and adaptable. Feel free to experiment with different fruits or cheeses, and enjoy the delightful combination of textures and flavors that will impress anyone at your table. Happy baking and bon appétit!