
Crunchy Panko Crusted Halloumi Recipe: A Delicious Introduction
Halloumi cheese has surged in popularity across various cuisines, beloved for its unique texture and savory flavor profile. Originating from Cyprus, this semi-hard, unripened cheese is made from a blend of sheep’s and goat’s milk, offering a delightful balance of creaminess and a firm bite. Halloumi has become a staple in Mediterranean dishes, often gracing the tables of food enthusiasts around the globe. Its ability to hold its shape when grilled or fried makes it an ideal candidate for a variety of recipes, and one of the most enticing ways to prepare this cheese is by creating a crunchy panko crust.
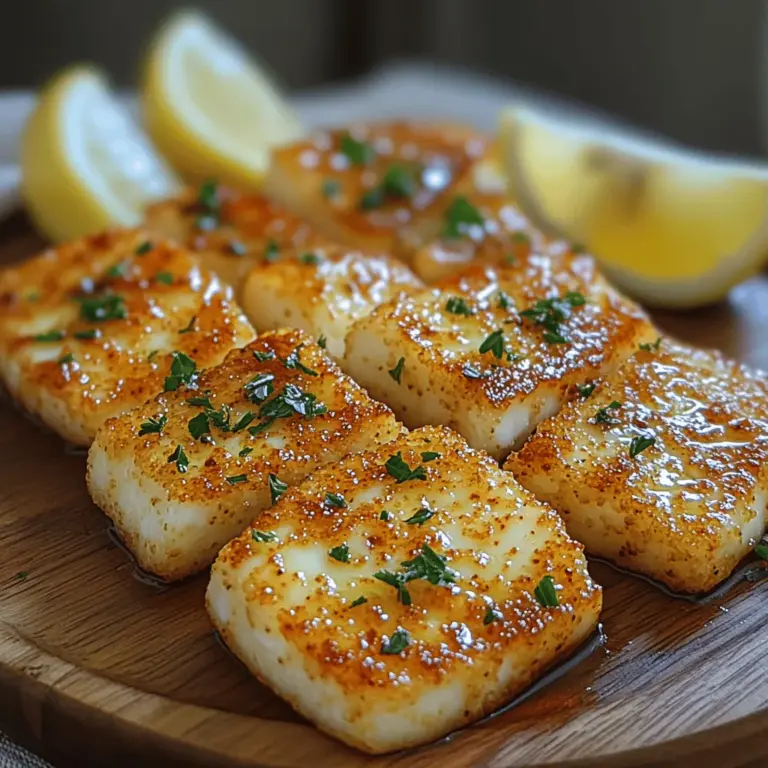
Introducing the Crunchy Panko Crusted Halloumi—a dish that perfectly marries the rich, salty flavor of halloumi with a golden, crispy exterior. This recipe is not only a crowd-pleaser but also a versatile addition to your culinary repertoire. Whether served as an appetizer, a component of a vibrant salad, or a side dish, the crispy texture and savory taste of this dish will leave your guests craving more.
Understanding Halloumi Cheese
To truly appreciate the Crunchy Panko Crusted Halloumi, it’s essential to delve deeper into what makes halloumi cheese special. Halloumi has a distinctive texture that sets it apart from other cheeses. When cooked, it becomes pleasantly chewy, with a satisfying bite that can elevate any dish. The flavor is mildly salty and savory, which makes it an excellent canvas for various seasonings and accompaniments.
Nutritionally, halloumi is packed with protein and calcium, making it a great choice for those looking to incorporate more nutrients into their meals. A typical serving of halloumi provides a hearty dose of protein, essential for muscle repair and growth, as well as calcium, which is vital for maintaining strong bones. This makes halloumi not only a delicious option but also a healthful one, especially for vegetarians seeking protein-rich alternatives.
One of the standout qualities of halloumi is its resilience when subjected to heat. Unlike many cheeses that tend to melt away when cooked, halloumi retains its shape and texture, making it perfect for frying, grilling, or baking. This moisture retention allows halloumi to develop a beautifully crispy exterior while remaining soft and flavorful on the inside, a characteristic that is beautifully showcased in the Crunchy Panko Crusted Halloumi.
Ingredients Overview
Before diving into the preparation of this delightful dish, let’s take a closer look at the ingredients that contribute to its unique flavor and texture.
1. Halloumi Cheese: The star of the dish. When shopping for halloumi, look for a firm texture and a bright, white color. Fresh halloumi is often sold in vacuum-sealed packages or brine. Opt for brands that use high-quality milk for the best flavor.
2. Panko Breadcrumbs: These Japanese-style breadcrumbs are lighter and flakier than traditional breadcrumbs, providing an exceptional crunch when fried. Their unique texture allows for more air to circulate during cooking, resulting in a crispy crust that is both light and satisfying.
3. All-Purpose Flour: This ingredient is essential for creating a dry coating that helps the egg mixture adhere to the halloumi. The flour serves as the first layer in the breading process, ensuring an even and crispy finish.
4. Eggs and Dijon Mustard: The egg mixture acts as a binding agent, helping the panko breadcrumbs stick to the halloumi. Adding Dijon mustard not only enhances the flavor but also contributes to a beautiful, rich color.
5. Seasonings: A blend of garlic powder, smoked paprika, salt, and pepper adds depth to the dish. These spices complement the halloumi’s natural flavor, elevating the overall taste experience.
6. Fresh Parsley and Lemon Wedges: These garnishes bring brightness to the dish, adding a fresh, zesty flavor that pairs wonderfully with the rich, savory halloumi.
Preparing the Crunchy Panko Crusted Halloumi
Now that we understand the ingredients that make this dish so appealing, let’s move on to the preparation process. The key to achieving the perfect Crunchy Panko Crusted Halloumi lies in the careful preparation of the cheese itself, as well as an organized approach to the breading process.
1. Preparation of Halloumi: Begin by slicing the halloumi into even pieces, approximately half an inch thick. This thickness allows the cheese to cook evenly while ensuring that it retains its shape. It’s crucial to dry the halloumi slices thoroughly with paper towels to remove excess moisture. This step is vital as it prevents the breading from becoming soggy and ensures a crispy finish.
2. Setting Up a Breading Station: To streamline the breading process, set up a systematic breading station. Arrange three shallow dishes: one for all-purpose flour, one for the egg mixture (beat the eggs with Dijon mustard), and one for the panko breadcrumbs mixed with the seasonings. This organized setup not only speeds up the process but also helps maintain cleanliness in the kitchen.
3. Breading the Halloumi: Start by dredging each slice of halloumi in the flour, ensuring it is completely coated. Shake off any excess flour before dipping it into the egg mixture, allowing any excess to drip back into the dish. Finally, coat the halloumi in the panko breadcrumbs, pressing gently to ensure an even layer. This systematic approach guarantees that each piece is evenly coated, providing a consistent crunch when cooked.
As you prepare the Crunchy Panko Crusted Halloumi, remember that the key to a successful dish lies in the details—from the careful selection of ingredients to the methodical approach in the breading process. By paying attention to each step, you’ll set the stage for a deliciously crispy and flavorful dish that is sure to impress.
{{image_2}}
The Breading Process
Breading halloumi might seem like a straightforward task, but doing it properly is key to achieving that perfect crunchy texture. Here’s how to bread your halloumi slices effectively:
Step 1: Prepare Your Ingredients
Before getting started, make sure you have everything ready. You will need:
– Halloumi cheese, sliced into ½-inch thick pieces
– All-purpose flour
– Eggs, beaten
– Panko breadcrumbs
– Salt and pepper for seasoning
Step 2: Flour the Halloumi
Begin by setting up a breading station. Place the flour in a shallow dish and season it with a pinch of salt and pepper. Dredge each slice of halloumi in the flour, ensuring it is fully coated. The flour acts as a base layer that helps the egg wash adhere to the cheese.
Step 3: Egg Wash
Next, dip each floured slice into the beaten eggs. Make sure to let any excess egg wash drip off; too much can cause the breadcrumbs to clump. The egg wash is crucial as it binds the panko to the halloumi, creating that desired crunch.
Step 4: Panko Coating
Finally, roll the egg-covered halloumi slices in panko breadcrumbs. Ensure an even coating by pressing gently on the breadcrumbs to help them adhere. It’s important to cover all sides, so take your time with this step. A well-coated piece of halloumi will yield a crispy finish once fried.
Tips for Even Coverage
– Use one hand for the dry ingredients (flour and panko) and the other for the wet (egg wash). This technique helps to keep your hands cleaner and prevents clumping.
– If you find that the panko isn’t sticking well, you can give the halloumi another light dip in the egg wash followed by another roll in the breadcrumbs.
Frying the Halloumi
Once your halloumi is breaded, it’s time to fry! This step is essential for achieving that golden-brown, crispy texture that makes this dish irresistible.
The Perfect Frying Technique
Heat a generous amount of oil in a large frying pan over medium heat. You’ll want enough oil to cover the bottom of the pan with about ¼ inch depth. The oil should be hot but not smoking; ideally, it should reach around 350°F (175°C).
Testing the Oil Temperature
To test if the oil is hot enough, drop a small piece of bread or a breadcrumb into the oil. If it sizzles and bubbles immediately, you are ready to start frying. If the oil is too cool, the halloumi will absorb excess oil and become greasy rather than crispy.
Frying in Batches
Place the breaded halloumi slices carefully in the hot oil, taking care not to overcrowd the pan. Fry in batches if necessary to maintain the oil temperature and ensure even cooking. Each slice should cook for about 2-3 minutes on each side or until golden brown and crispy.
Finishing Touches
Once fried, it’s vital to drain excess oil properly to maintain that delightful texture.
Draining Excess Oil
Use a slotted spoon to remove the halloumi from the oil and transfer it to a paper towel-lined plate. This step is crucial for preventing sogginess. Let them sit for a couple of minutes to absorb any remaining oil.
Garnishing and Serving
For a pop of color and flavor, garnish your crispy halloumi with fresh parsley. A squeeze of lemon juice just before serving adds brightness to the dish and enhances the flavors of the cheese.
Serving Suggestions
Crunchy Panko Crusted Halloumi is incredibly versatile and can be served in numerous ways.
Creative Serving Ideas
– Dips and Sauces: Pair your halloumi with delicious dips like tzatziki, spicy mayo, or a fresh salsa. These accompaniments can elevate the dish and add a new layer of flavor.
– Incorporating into Dishes: Use the crispy halloumi as a topping for salads, wrap it in flatbreads, or include it as part of a mezze platter. It pairs beautifully with roasted vegetables, grains, or even grilled meats.
Nutritional Information
This Crunchy Panko Crusted Halloumi recipe is not only delicious but also provides a satisfying nutritional profile. Here’s a breakdown per serving:
– Calories: Approximately 300
– Protein: 18g
– Fat: 22g
– Carbohydrates: 18g
Flavor and Texture Balance
This dish is a delightful balance of creamy, salty halloumi and crunchy panko. The contrasting textures make each bite an enjoyable experience, while the flavors pair well with a variety of sides and toppings.
Conclusion
In summary, Crunchy Panko Crusted Halloumi is a simple yet delicious recipe that showcases the unique flavors and textures of halloumi cheese. This dish is not only versatile but also a crowd-pleaser, making it perfect for entertaining or a hearty meal at home.
Don’t hesitate to try this recipe and share it with loved ones. The joy of cooking and sharing delightful meals is something special, and this dish is sure to make a lasting impression. Enjoy the process and the delicious results!
